3CX v20
| Who is this for? | Required permissions and licenses |
|---|---|
| • Administrators who manage company integrations and have IT access to the 3CX server. | • License required: depending on your plan, check availability in Settings > Integrations. • Administrator rights on your Leexi account. • Self-hosted 3CX server (not hosted by 3CX) running Debian OS. • IT access to your 3CX server. |
How to use it
Estimated time: 20 minutes.
Enable call recording
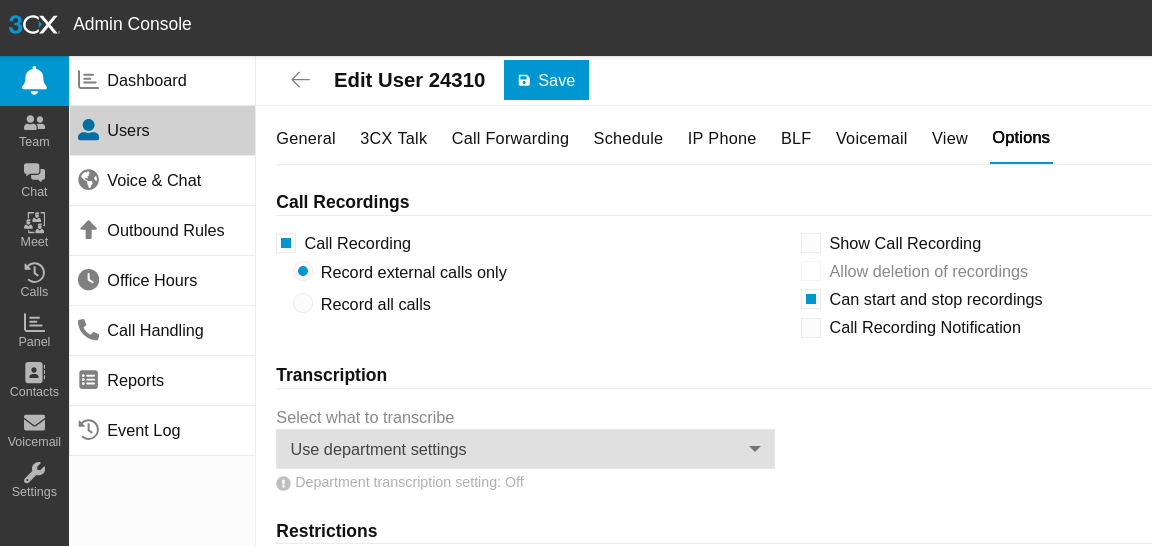
Go to the 3CX admin console, under Users.

Click on each user, go to Options and select the Call Recording - Record external calls only option. You can also choose to record all calls, but only external calls will be imported into Leexi.
Configure remote archiving
Under Admin → System → Storage, check whether Enable Remote Data Storage & Archive is enabled. If it is disabled, you can leave it as is. If it is enabled, check the following points.
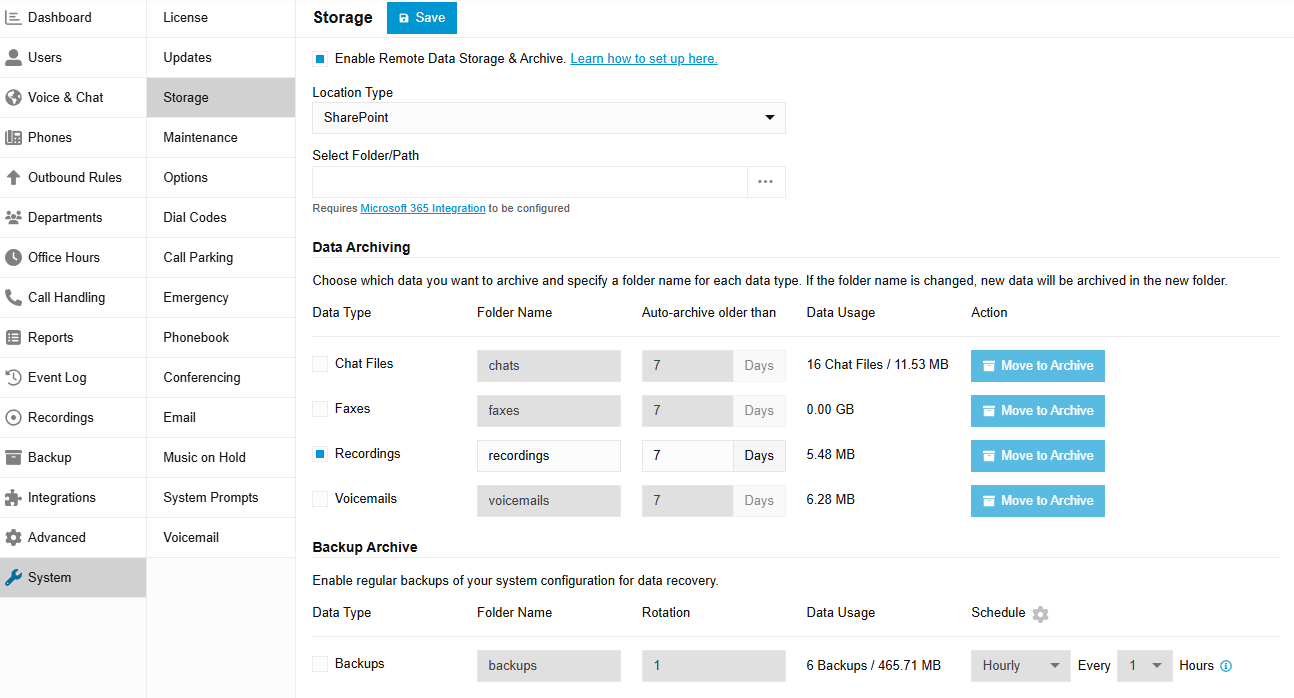
- You can leave the Location Type as is, or configure it to your preference.
- If Data Archiving of recordings is enabled, make sure "Auto-archiving older than" is set to at least 1 day.
- For Temporary recording location, select
/var/lib/3cxpbx/Instance1/Data/Recordingsor the location of your choice. If you choose a different location, copy the value: you will need it when activating the integration.
Click Save.
Enable call logs (CDR)
In the 3CX admin console, go to Advanced → CDR and select Enable CDR, with the Single files for each call option (and not Single file for all calls!).
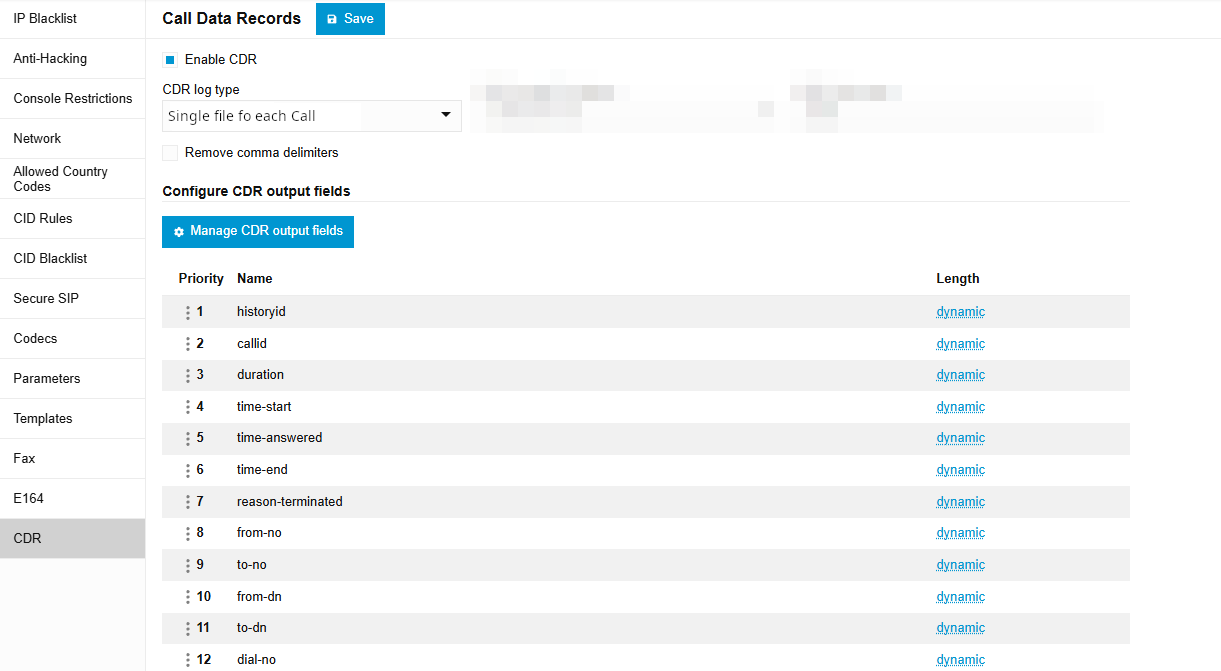
Leave the CDR output fields as configured by default (the field order must match the screenshot above).
Create a user with SSH access
Leexi's 3CX integration requires SSH access to your server to retrieve call recordings and CDR files. The user Leexi will use to access your server must have read access to your 3CX server's data folder and its contents (typically /var/lib/3cxpbx/Instance1/Data/).
In Leexi, go to Settings > Integrations > 3CX, click Add and copy the public key.
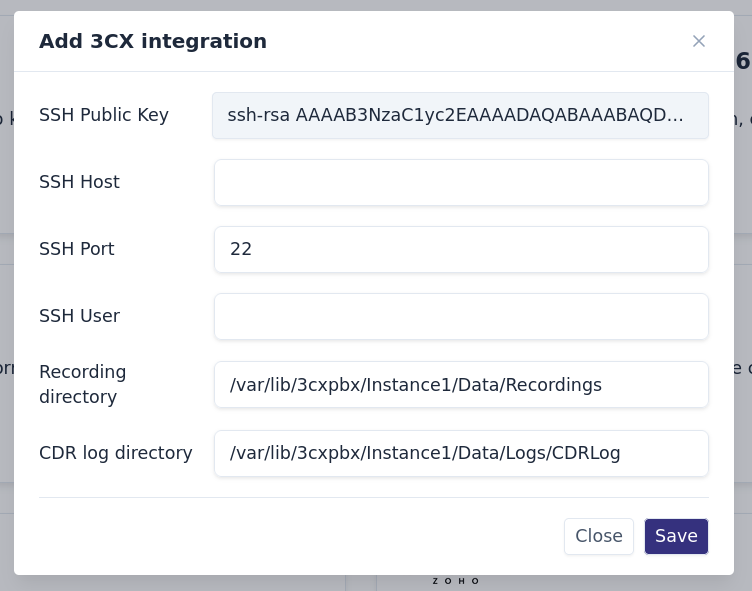
Then log in to your PBX server, create a user (suggested name: "leexi") and add the public key to the authorized SSH keys. On Debian, run:
sudo useradd -m leexi -s /bin/bash
sudo passwd leexi
# set password

# Add leexi to the phonesystem group to ensure it has access to the necessary files
sudo usermod -aG phonesystem leexi

su leexi
# enter password
cd /home/leexi
mkdir ~/.ssh/
vim ~/.ssh/authorized_keys
# paste the public key and save (:wq)
chmod 700 ~/.ssh && chmod 600 ~/.ssh/authorized_keys
Adjust firewall rules
Open a port (22 by default) and add the following IP addresses to the allowlist: 13.39.26.202, 15.188.160.114 and 15.236.114.242.
Enable the integration
In Leexi, fill in the host (fixed public IP or DNS), the port and the username in the 3CX integration, then click Save. Activation fails if Leexi cannot connect to your server with the information provided.
Match users to extensions
Once the 3CX integration is enabled, Leexi retrieves all extensions for which at least one call has been recorded since CDR logs were enabled. These extensions must be matched to the corresponding Leexi user. An extension only appears in the list if it has at least one recent call.
Go to Settings > Integrations > 3CX, click Manage, match Leexi users to their extension, then Save.
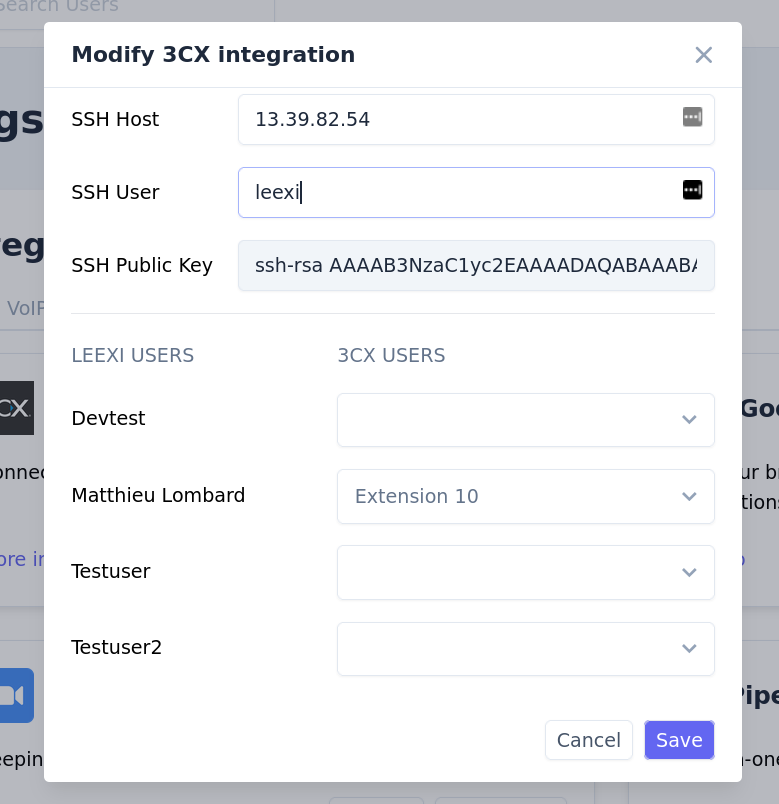
Your next 3CX calls will appear in Leexi! Calls from the last 6 hours will also be imported, but not the full history.
Frequently asked questions
Things to watch out for
- Internal calls (between different 3CX users) are not imported into Leexi.
- Only external calls are imported into Leexi, even if you record all calls.
- On activation, only calls from the last 6 hours are imported, not the full history.
- An extension only appears in the matching list if at least one recent call has been recorded with it.