Okta (SAML)
| Who is this for? | Required permissions and licenses |
|---|---|
| • Administrators who manage company authentication. | • Administrator rights on your Leexi and Okta accounts. • License required: depending on your plan, check availability in Settings > Integrations. |
How to use it
Create a new Okta application
In the sidebar, go to Applications > Applications, click Create App Integration, choose SAML 2.0, then click Next.
General settings
Give the new Okta application a name (this name is shown to your collaborators).
Configure SAML
- Fill in Single sign-on URL with Leexi's reply URL
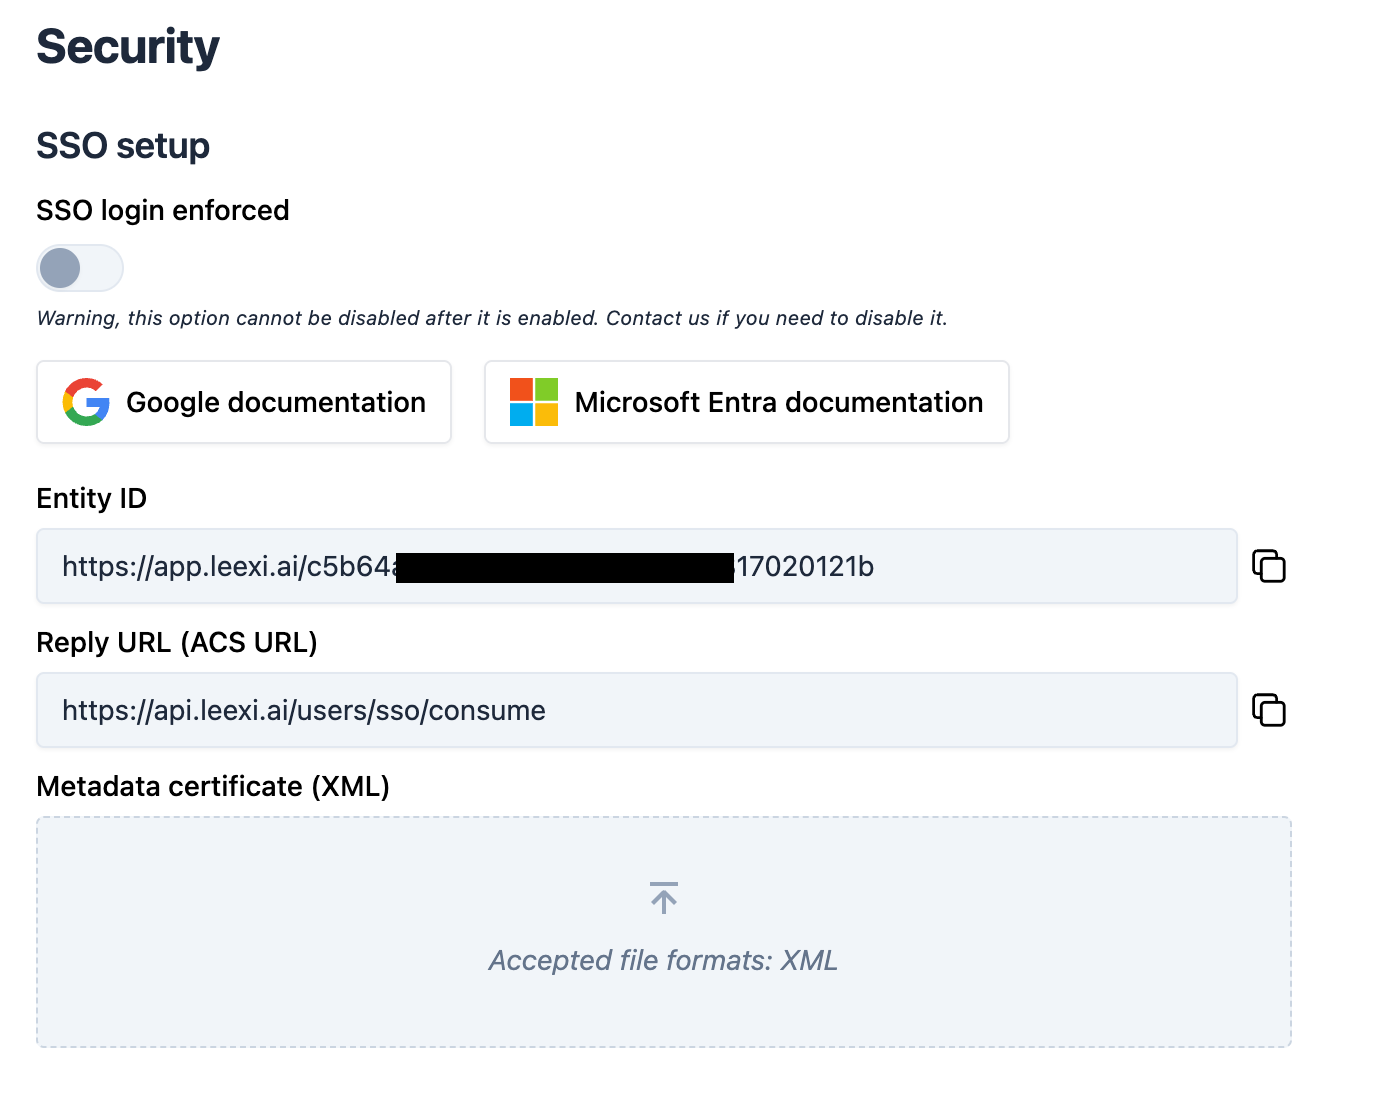
https://api.leexi.ai/users/sso/consume(leave the "Use this for Recipient URL and Destination URL" option checked). - Fill in Audience URI (SP Entity ID) with Leexi's Entity ID, available at https://app.leexi.ai/en/settings/security.
Click Next without changing the other SAML settings (keep Okta's default values).
Feedback
Click This is an internal app that we have created, then Finish.
Retrieve the metadata and import it into Leexi
Open the Sign On tab, scroll down to Metadata URL and click Copy. Open the copied link, right-click on the page and choose Save as. Import this .xml file at https://app.leexi.ai/en/settings/security under Metadata certificate (XML).
Assign users
Open the Assignments tab, click Assign, then Assign to People or Assign to Groups depending on your usual usage.
SSO is now configured for these users: they can sign in with their Okta credentials.
Going further
Enforce SSO login (optional)
After the steps above, users in your workspace can still sign in with email/password or already via SSO. Once all users have been onboarded and have successfully signed in via SSO, you can enforce SSO across your entire workspace. Only Leexi has the authority to disable this setting, to prevent any unwanted behavior.