Microsoft Dynamics 365 Sales
| Who is this for? | Required permissions and licenses |
|---|---|
| • For administrators managing the company's integrations. | • Administrator rights on your Leexi and Microsoft accounts. • A Microsoft account with the Global Administrator or Privileged Role Administrator role to grant consent. • License required: depending on your plan, check availability in Settings > Integrations. |
How to use it
Grant admin consent
- Open the following URL in your browser: https://login.microsoftonline.com/common/adminconsent?client_id=34cbe9bd-0bba-4c64-abfa-ab6b73fecb5d
- Sign in with an account that has Global Administrator or Privileged Role Administrator permissions.
- Click Accept to grant consent.
Register the Leexi application user in Dynamics
- Go to the Power Platform Admin Center.
- Go to Environments and select your Dynamics environment.
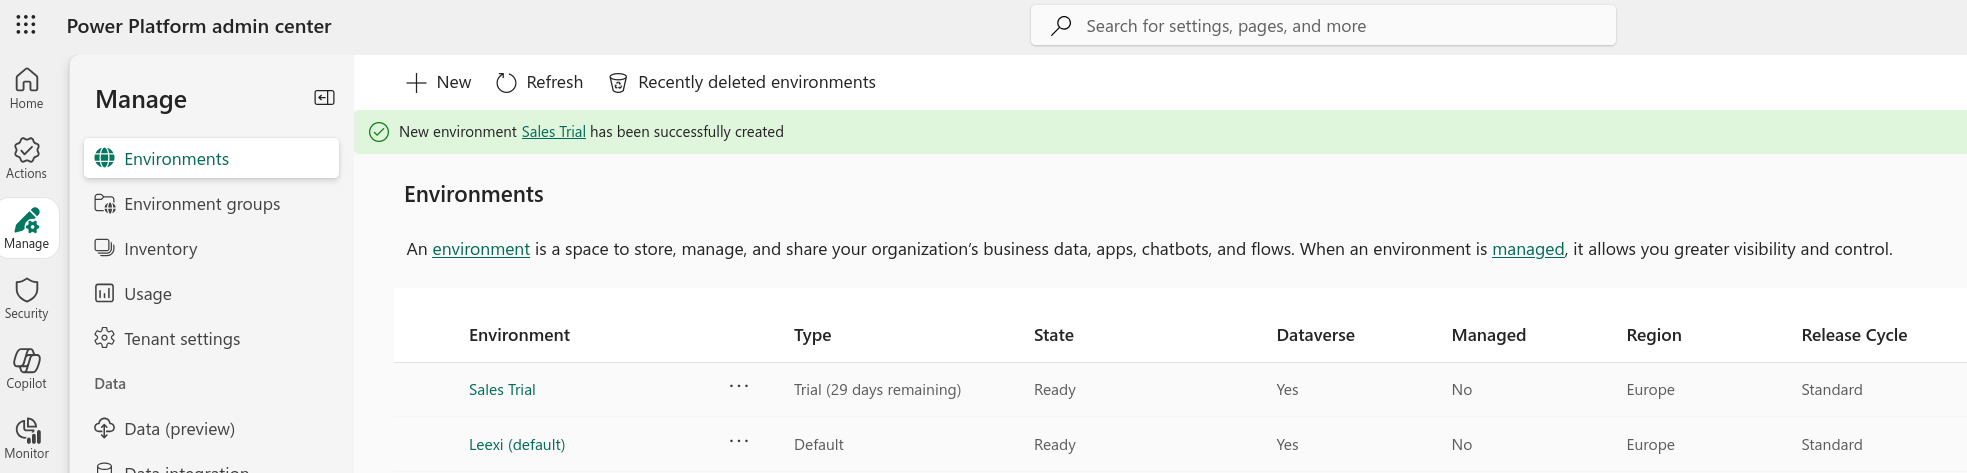
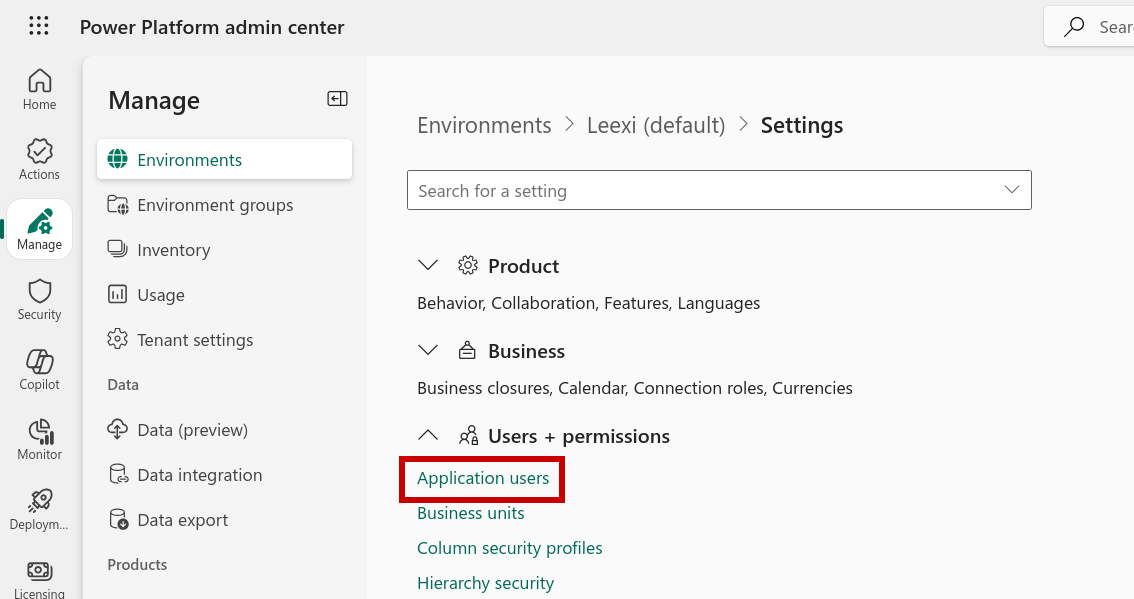
- Click Settings (top bar), then Users + permissions and Application users.

- Click + New app user.

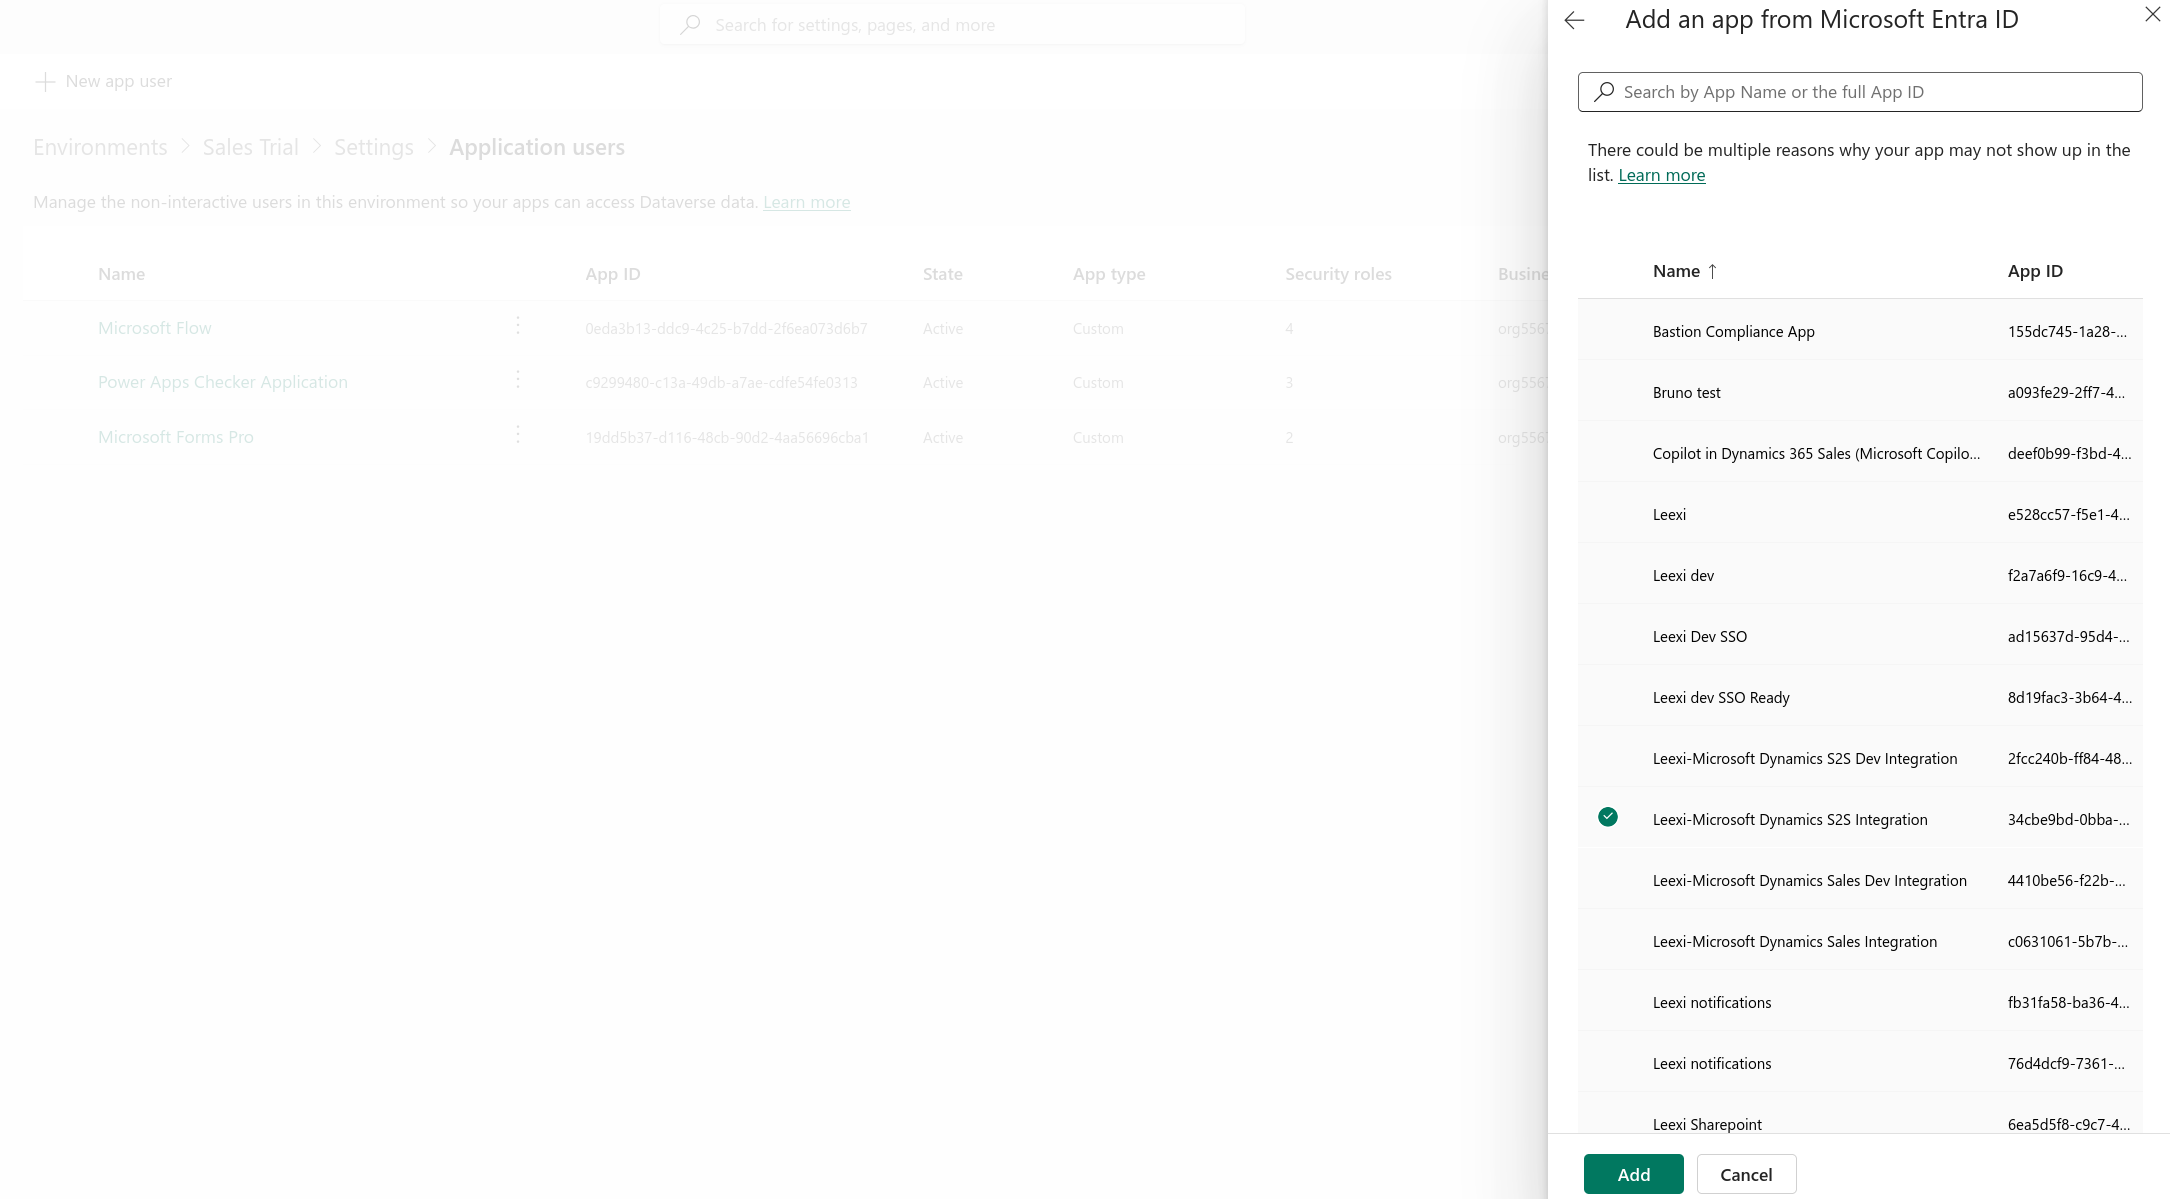
- Click + Add an app and search for the following Client ID:
34cbe9bd-0bba-4c64-abfa-ab6b73fecb5d(Leexi-Microsoft Dynamics S2S Integration). If the application doesn't appear, check that the first step was completed correctly.
- Select your Business Unit (usually the root business unit).
- Click Create.
Assign a security role
The application user needs permissions to create and update notes (annotations) in Dynamics.
- In the Application users list, find the Leexi user you just created.
- Click it, then click Edit security roles.
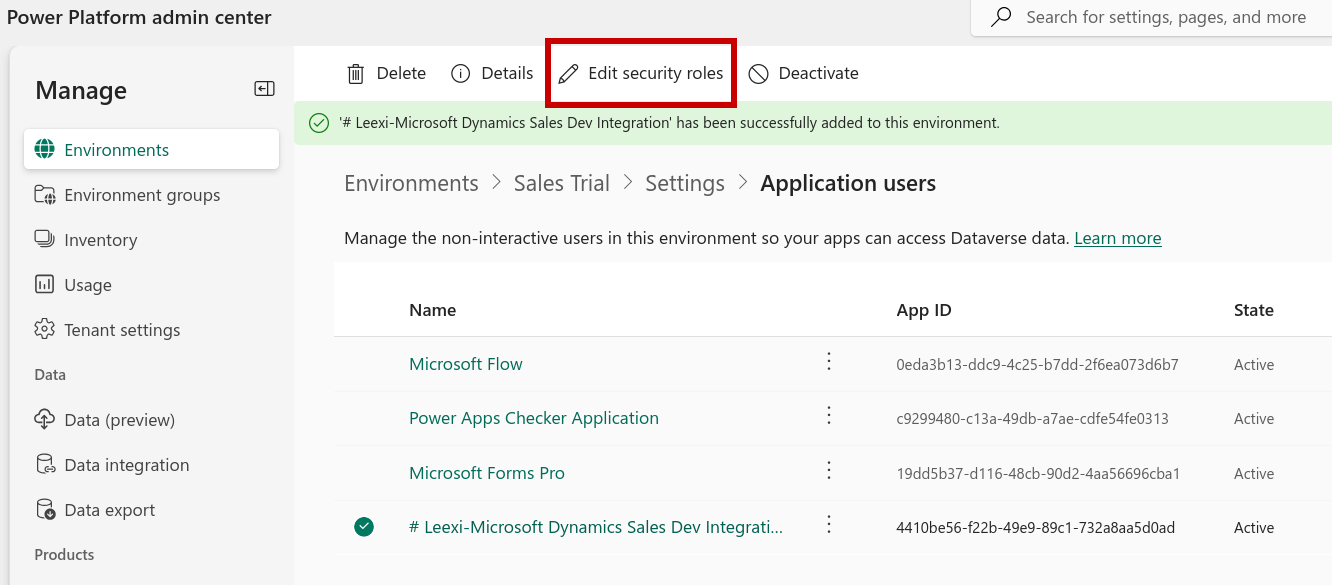
- Assign one of the following combinations:
- Delegate + Salesperson + System admin;
- Delegate + a custom security role with at least the following privileges:
prvActOnBehalfOfAnotherUser, prvReadAttribute, prvReadEntity, prvWriteContact, prvReadContact, prvWriteAccount, prvReadAccount, prvWriteOpportunity, prvReadOpportunity, prvWriteLead, prvReadLead, prvReadNote, prvWriteNote, prvCreateNote. These privileges must be granted at the organization level (Global), or at least at the business unit level.access is required for the CRM field autofill feature.
- Click Save.
Enable the integration in Leexi
- Log in to Leexi and go to Settings → Integrations.
- Find Microsoft Dynamics and click Add.
- Enter the URL of your Dynamics environment (e.g.
https://yourorg.crm4.dynamics.com). - Click Submit.
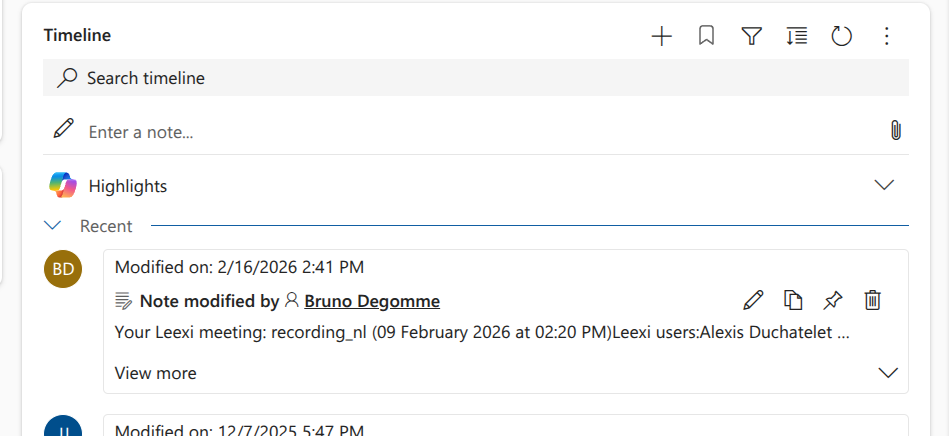
Done! Your CRM information is now synced with Leexi and call notes appear in the timeline of your deals, leads, contacts, and organizations.
Going further
Saving notes on appointments
You may prefer your notes to appear on your appointments rather than on your deals, leads, contacts, and organizations. In that case, when enabling the integration, select the option to send notes to the corresponding appointments.
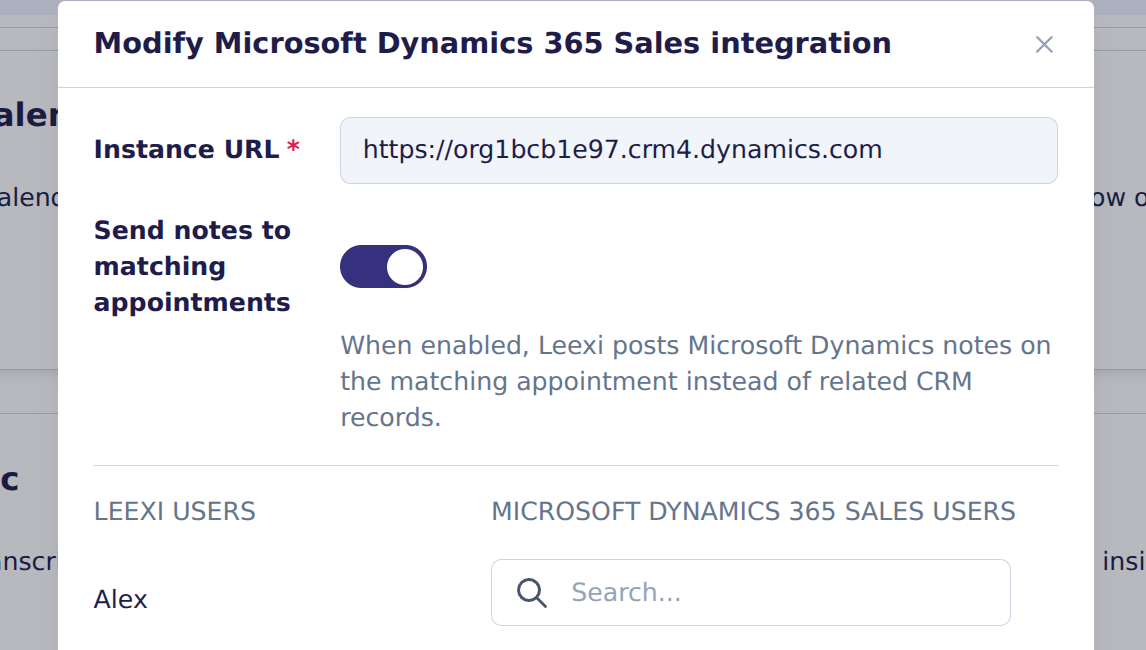
This option requires the additional permissions prvReadActivity and prvAppendToActivity on the service account.
To display these notes in your Microsoft Dynamics account:
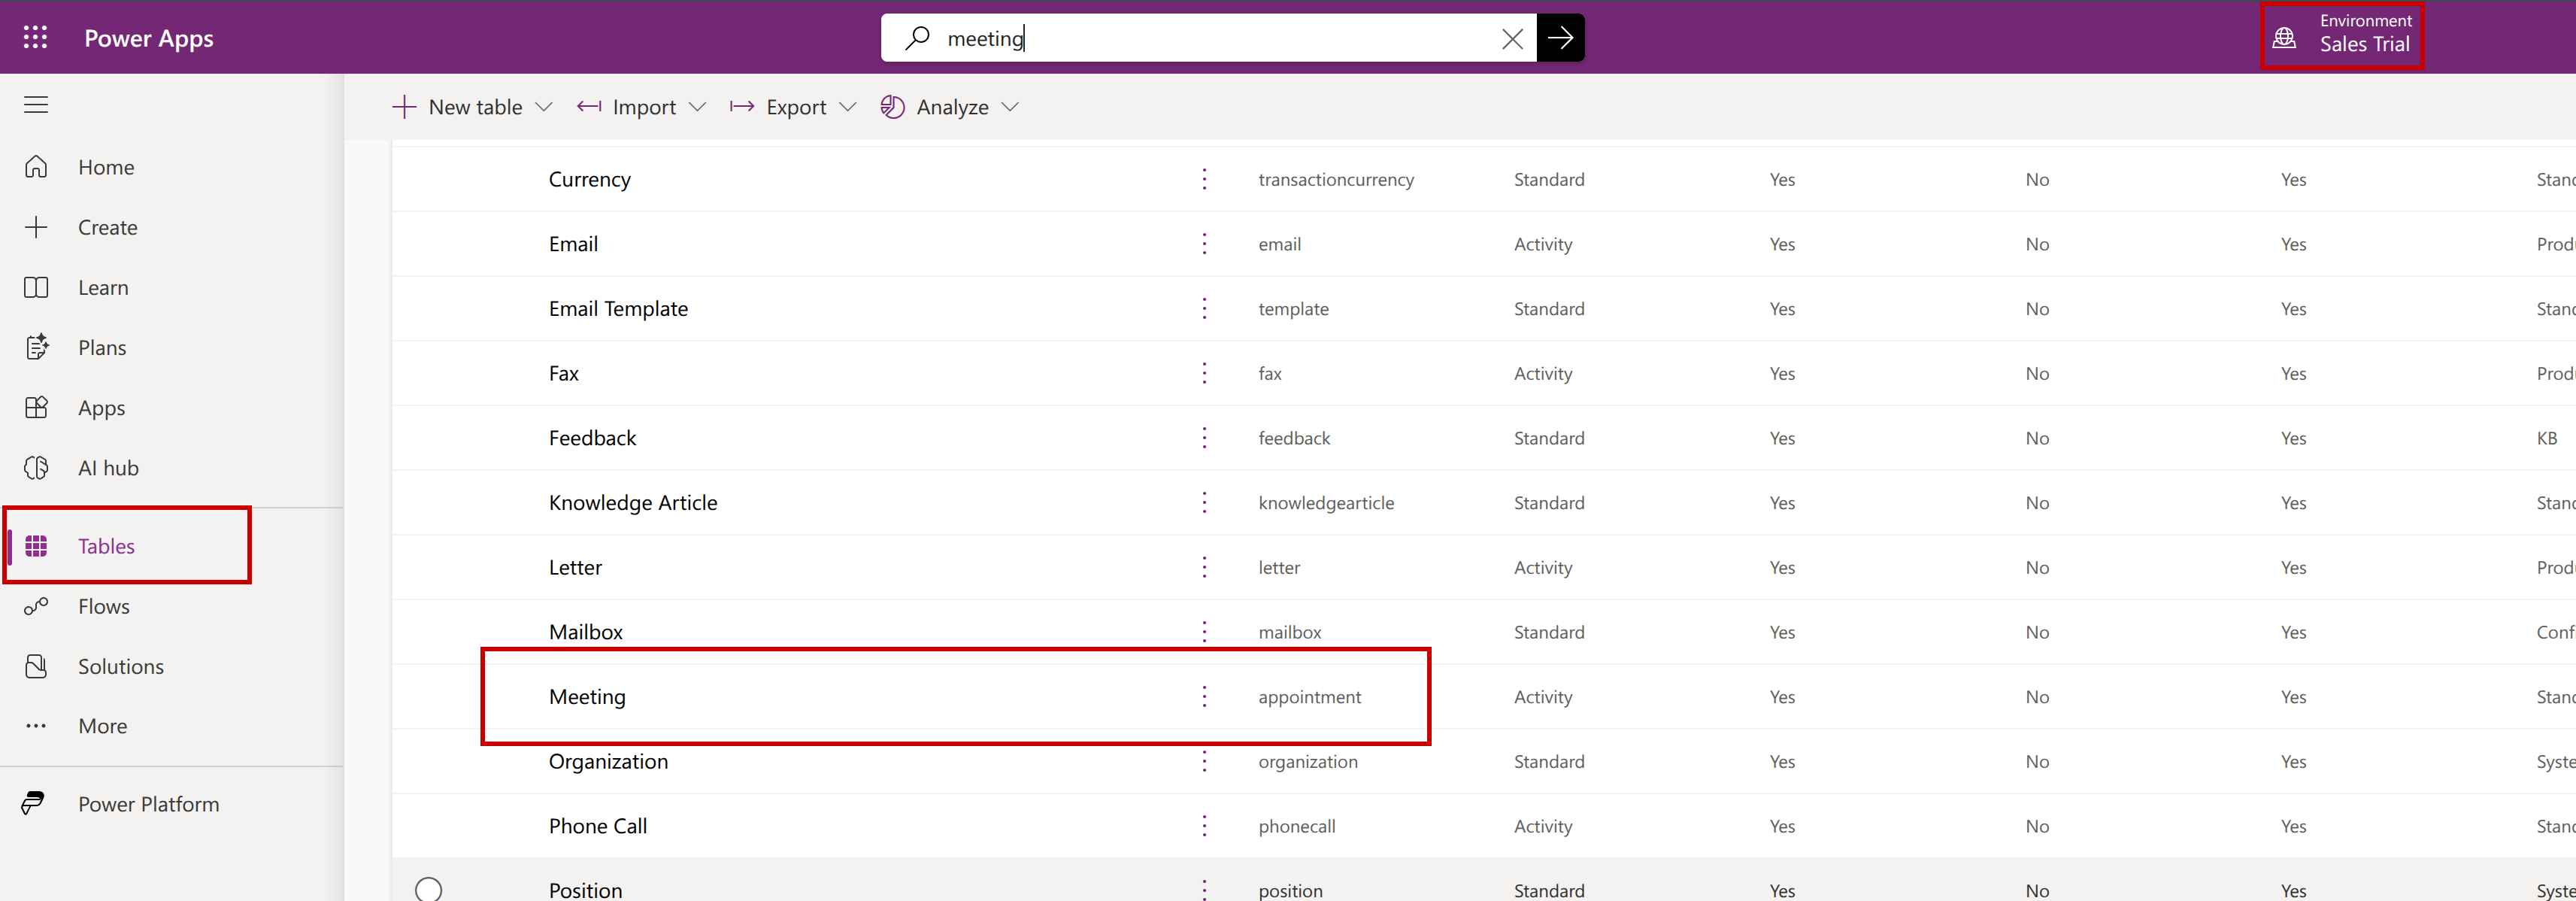
- Go to Power Apps.
- Check that you're in the right environment, go to Tables, and click the Meeting table.
- Click Forms.

- Click Appointment.
- Click Component, then drag the Timeline component to the center, under the description component.
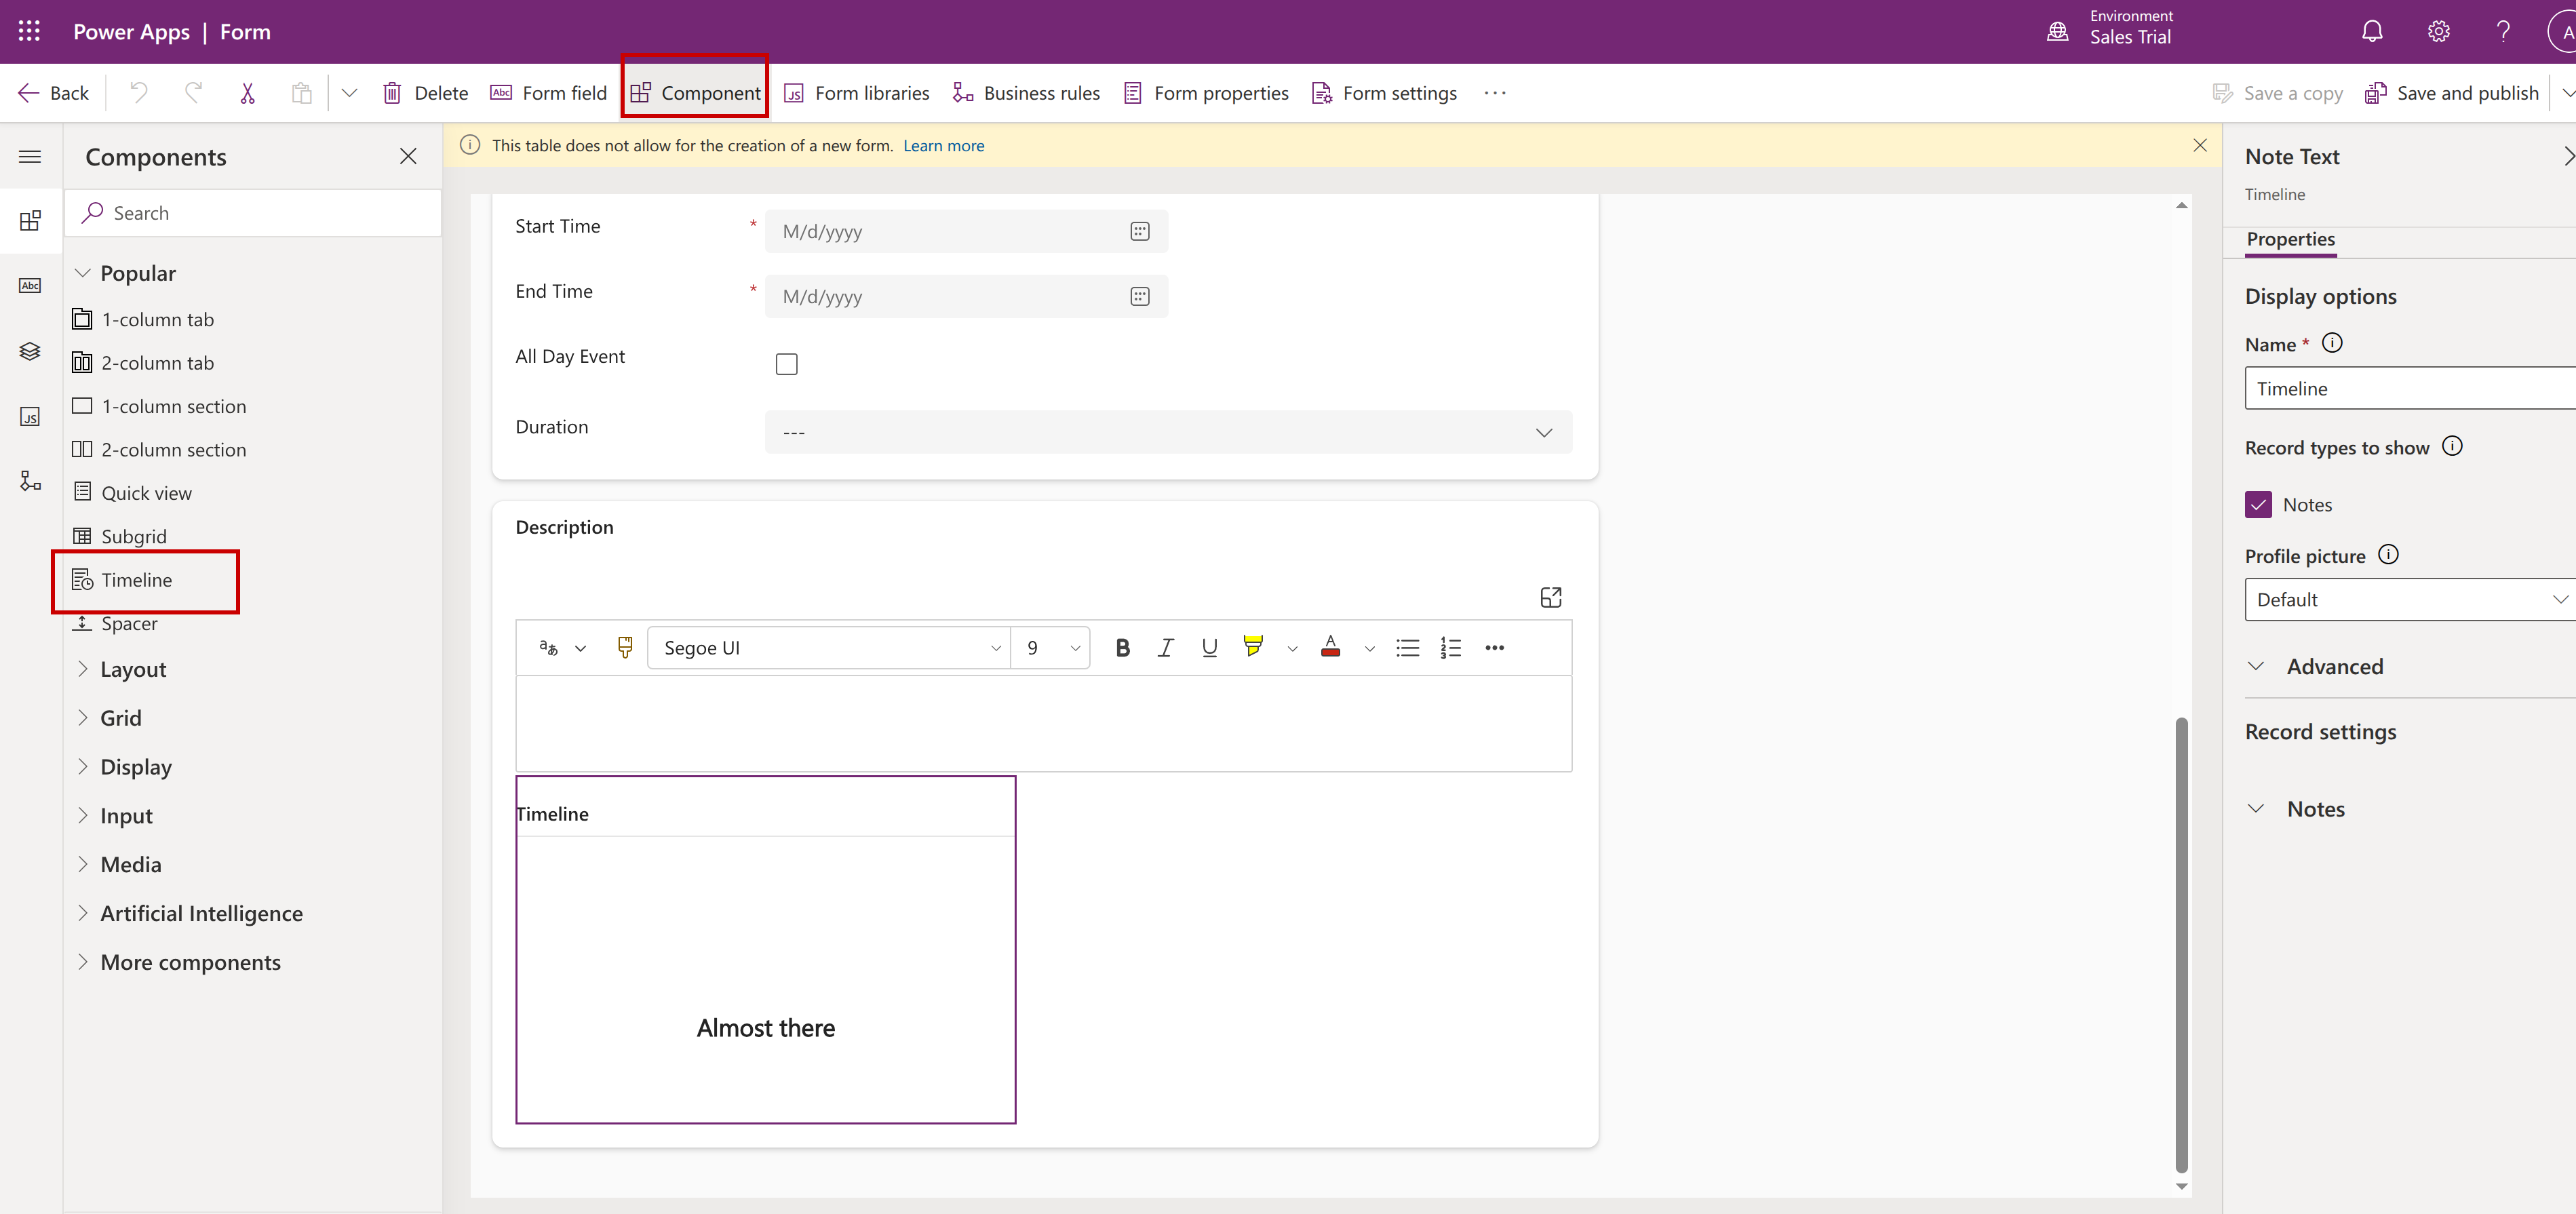
Your notes now appear correctly on your appointments.
Saving the call summary on custom objects or attributes
You may prefer the call summary not to appear as a note, but on a custom object or attribute instead. You can configure this in your environment with a Power Automate cloud flow using the Dataverse connector.
Dataverse trigger in Power Automate:
When a row is added
Table name: Notes / Annotations
Change type: Added
Scope: Organization
Dataverse can trigger flows when a row is added, modified, or deleted. The table is usually called Notes (logical name: annotation).
In the annotation row, examine the lookup fields linked to the associated object, typically _objectid_value, and the associated table type, often exposed as objecttypecode.
Continue only if the note is about an appointment. Example condition: objecttypecode == appointment, or whatever Power Automate exposes: Object Type == appointment.
Use Dataverse:
Get a row by ID
Table: Appointments
Row ID: _objectid_value
This step depends on your data model.
If the appointment has a lookup field to your custom object, for example new_custome_object, retrieve this field's identifier from the appointment.
If your custom object has a lookup field to the appointment, use:
List rows
Table: CustomObject
Filter rows: _new_appointment_value eq <appointmentid>
Update a row
Table: Custom Object
Row ID: <custom object id>
Attribute: <annotation text>
Dataverse's Update a row action is the standard way to update a Dataverse record from Power Automate. The field containing the annotation content is usually notetext (displayed as Note Text).
Things to watch out for
- Write access on the security role is required for CRM field autofill.
- With the option to send notes to appointments, Leexi calls without an associated appointment (mobile recordings, ad hoc meetings) don't generate a note in Microsoft Dynamics.