Microsoft Entra (SAML + SCIM)
| Who is this for? | Required permissions and licenses |
|---|---|
| • Administrators who manage company authentication. | • License required: depending on your plan, check availability in Settings > Integrations. • Administrator rights on your Leexi and Entra accounts. |
How to use it
Create a new Entra application
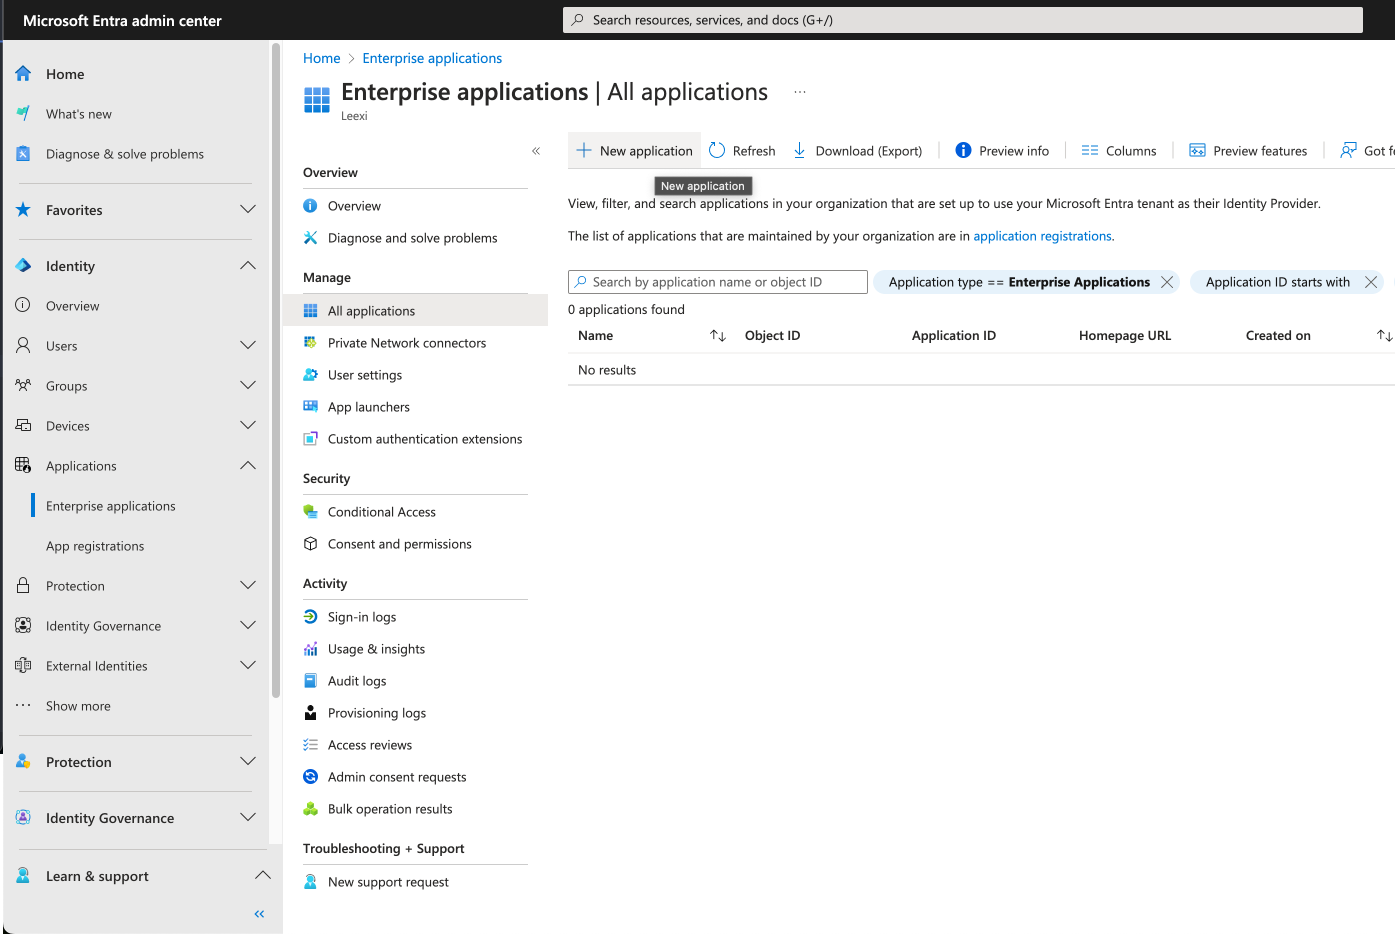
Go to entra.microsoft.com. In the sidebar, click Applications > Enterprise applications, then New application.
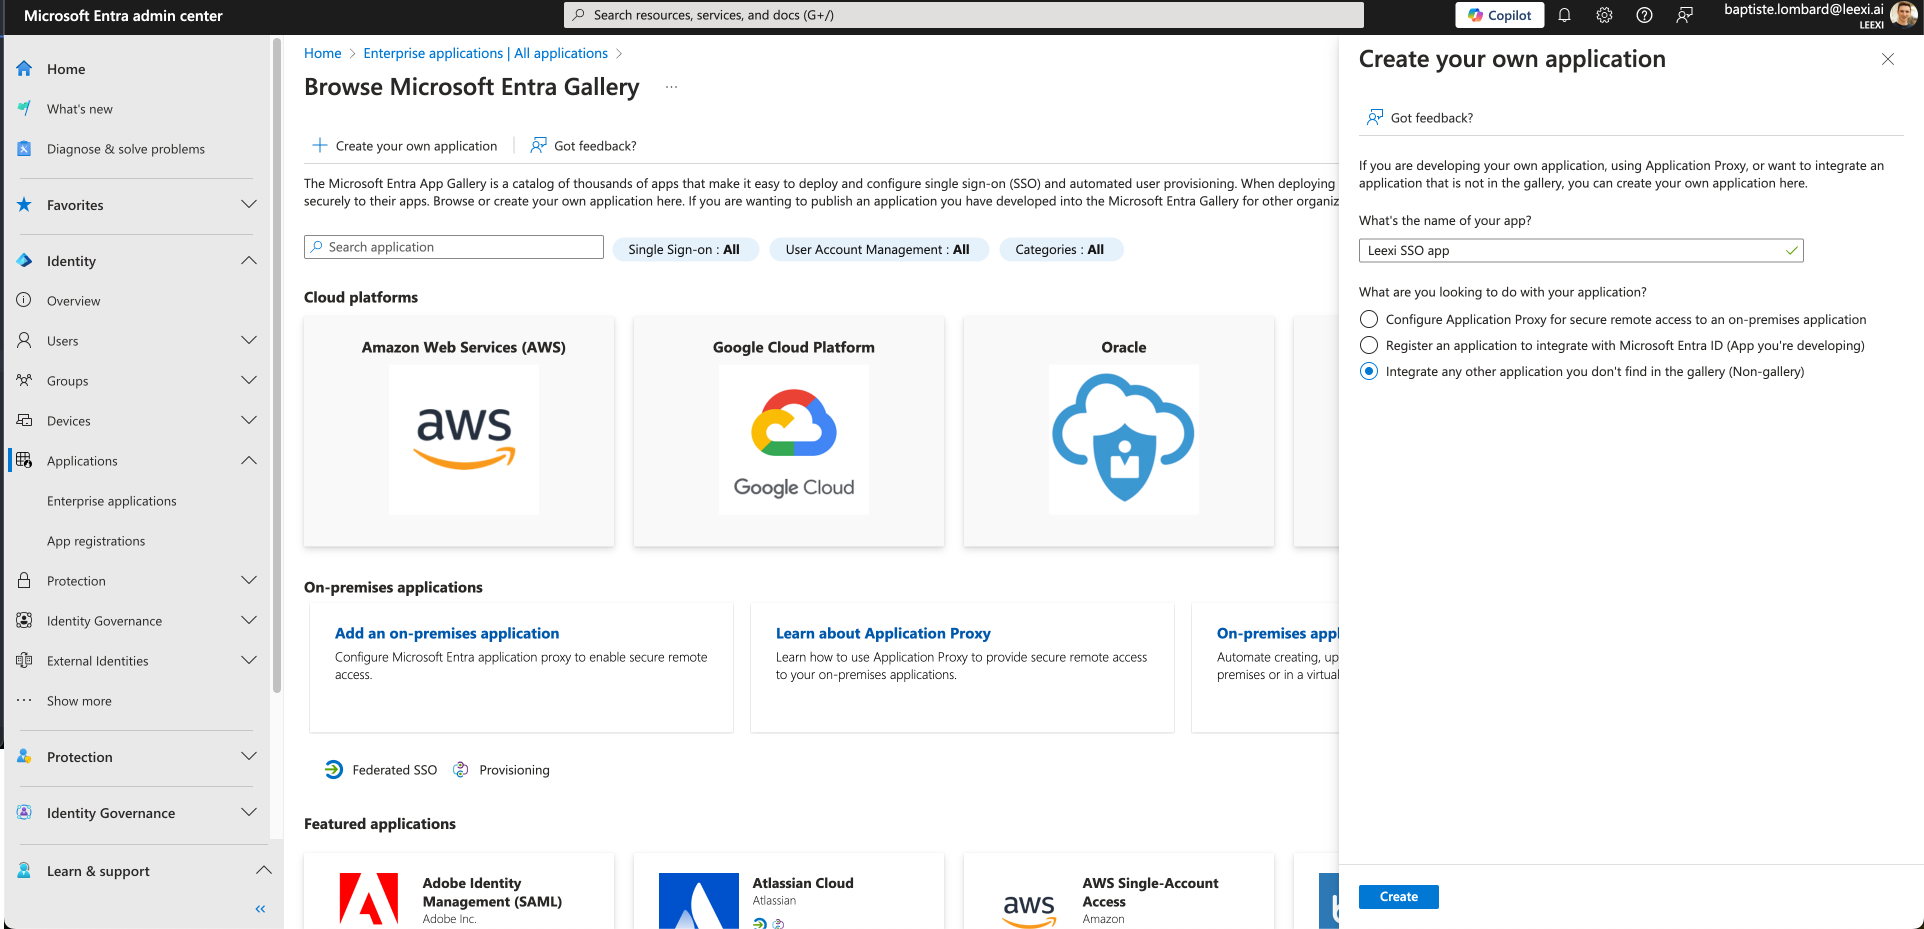
Click Create your own application, enter a name in What's the name of your app? (for example Leexi SSO), leave the Integrate any other application you don't find in the gallery (Non-gallery) option checked, then click Create.
Configure the SAML identifier of your Entra application
Navigate to your application, click Single sign-on in the sidebar, then SAML. Click the Edit icon to the right of Basic SAML Configuration.
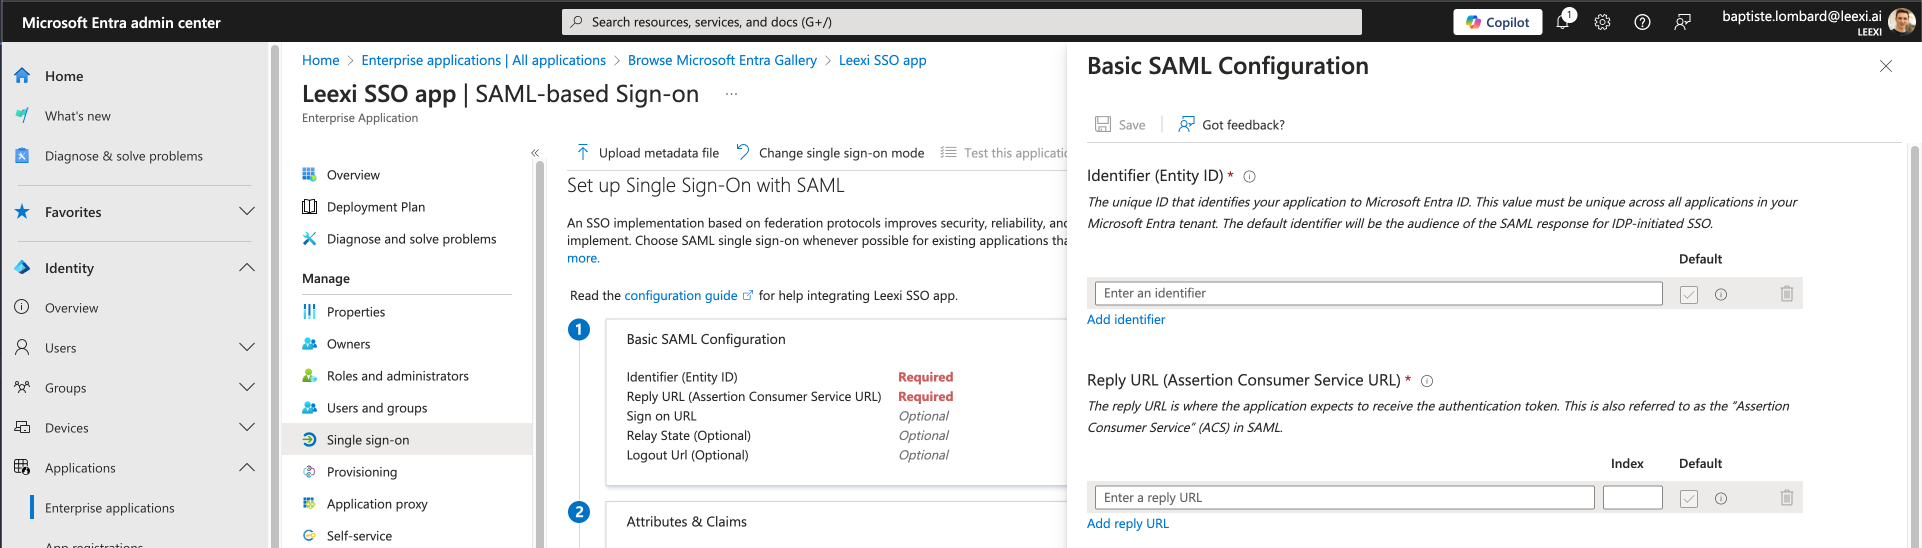
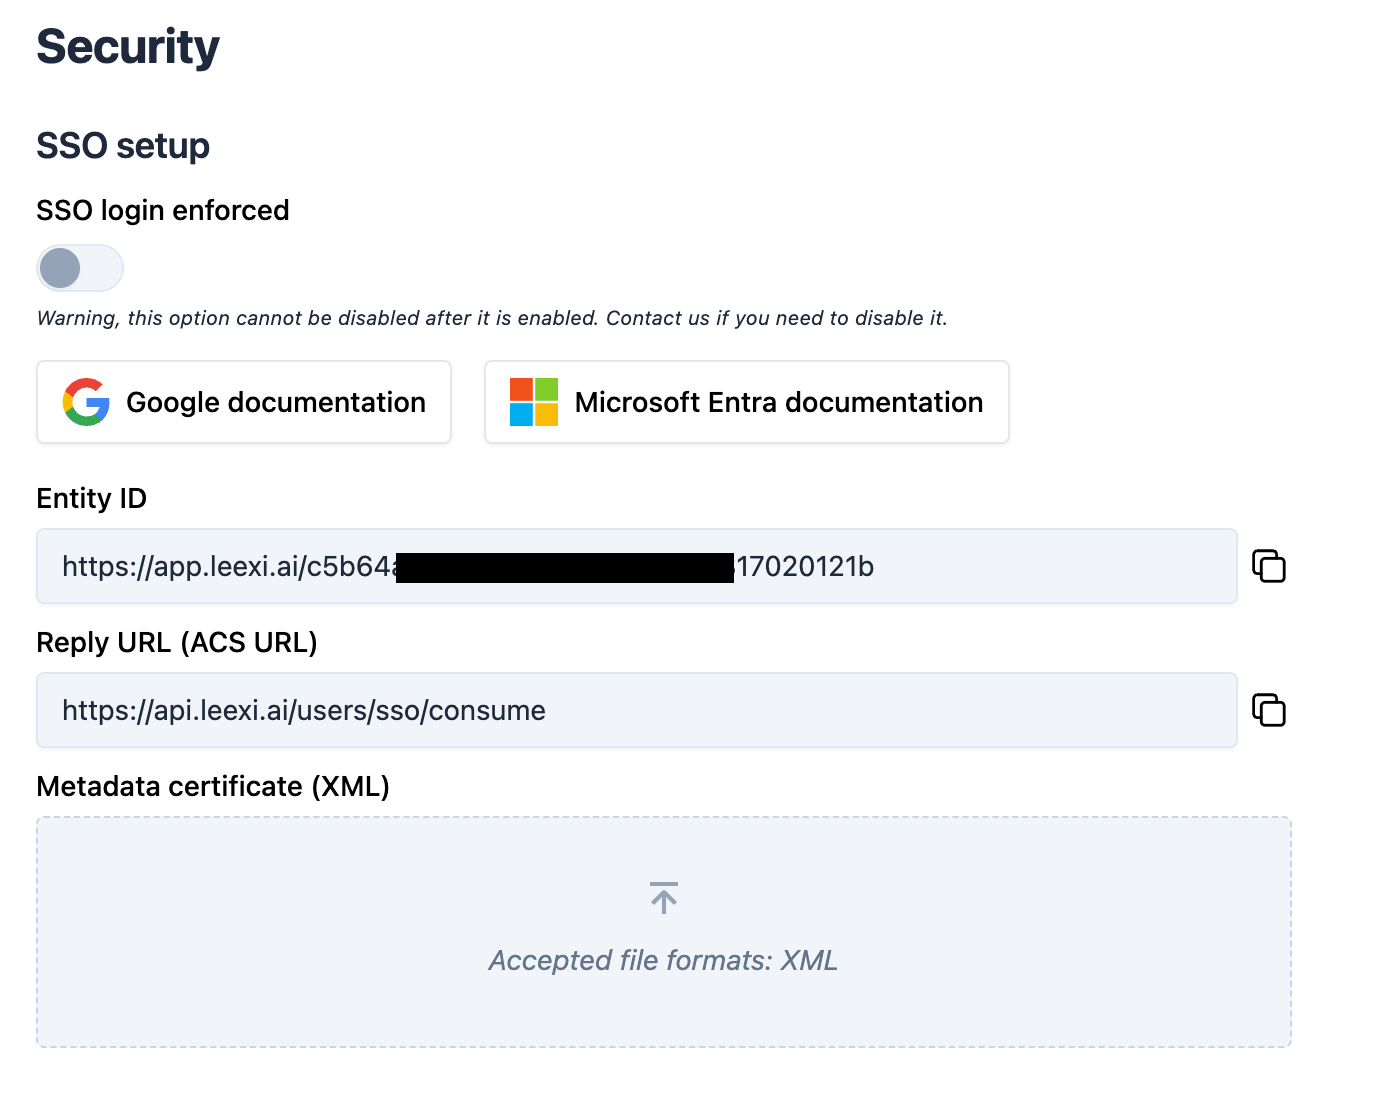
Click Add identifier: a field appears under the Identifier (Entity ID) section. Enter Leexi's Entity ID there, which you can find at https://app.leexi.ai/en/settings/security. No need to click "Add identifier" again: once the value is pasted, move on.
Under the Reply URL (Assertion Consumer Service URL) section, click Add reply URL and enter Leexi's reply URL: https://api.leexi.ai/users/sso/consume.
Leave all other settings at their default value and click Save at the top of the page.
Download your application's Federation Metadata XML file
In your application's sidebar, click Single sign-on and scroll down to the SAML Certificates section.
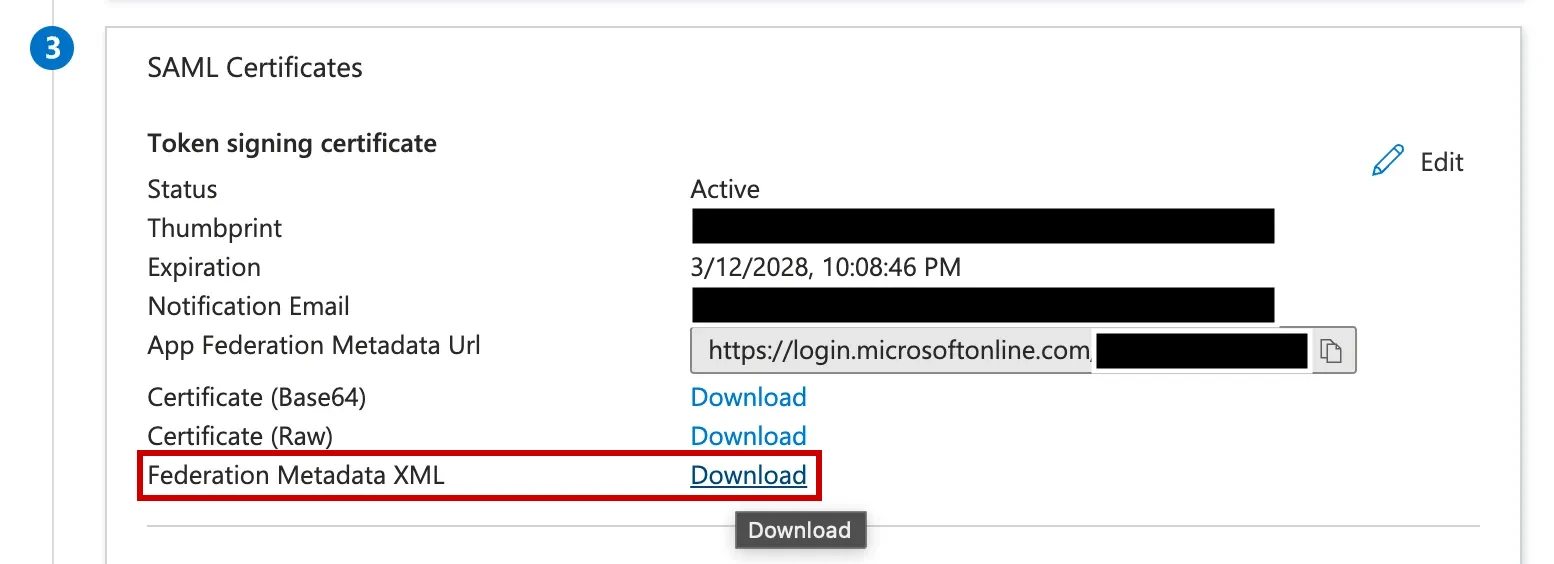
Click the Download link next to Federation Metadata XML: your browser downloads a file. Import this file at https://app.leexi.ai/en/settings/security under Metadata certificate (XML). This is an .xml file named after your Entra application.
Assign users to the new application
If you're already familiar with assigning users to Entra applications, use your usual process. Otherwise, the simplest way is to click Users and groups in the application's sidebar, then Add user/group.
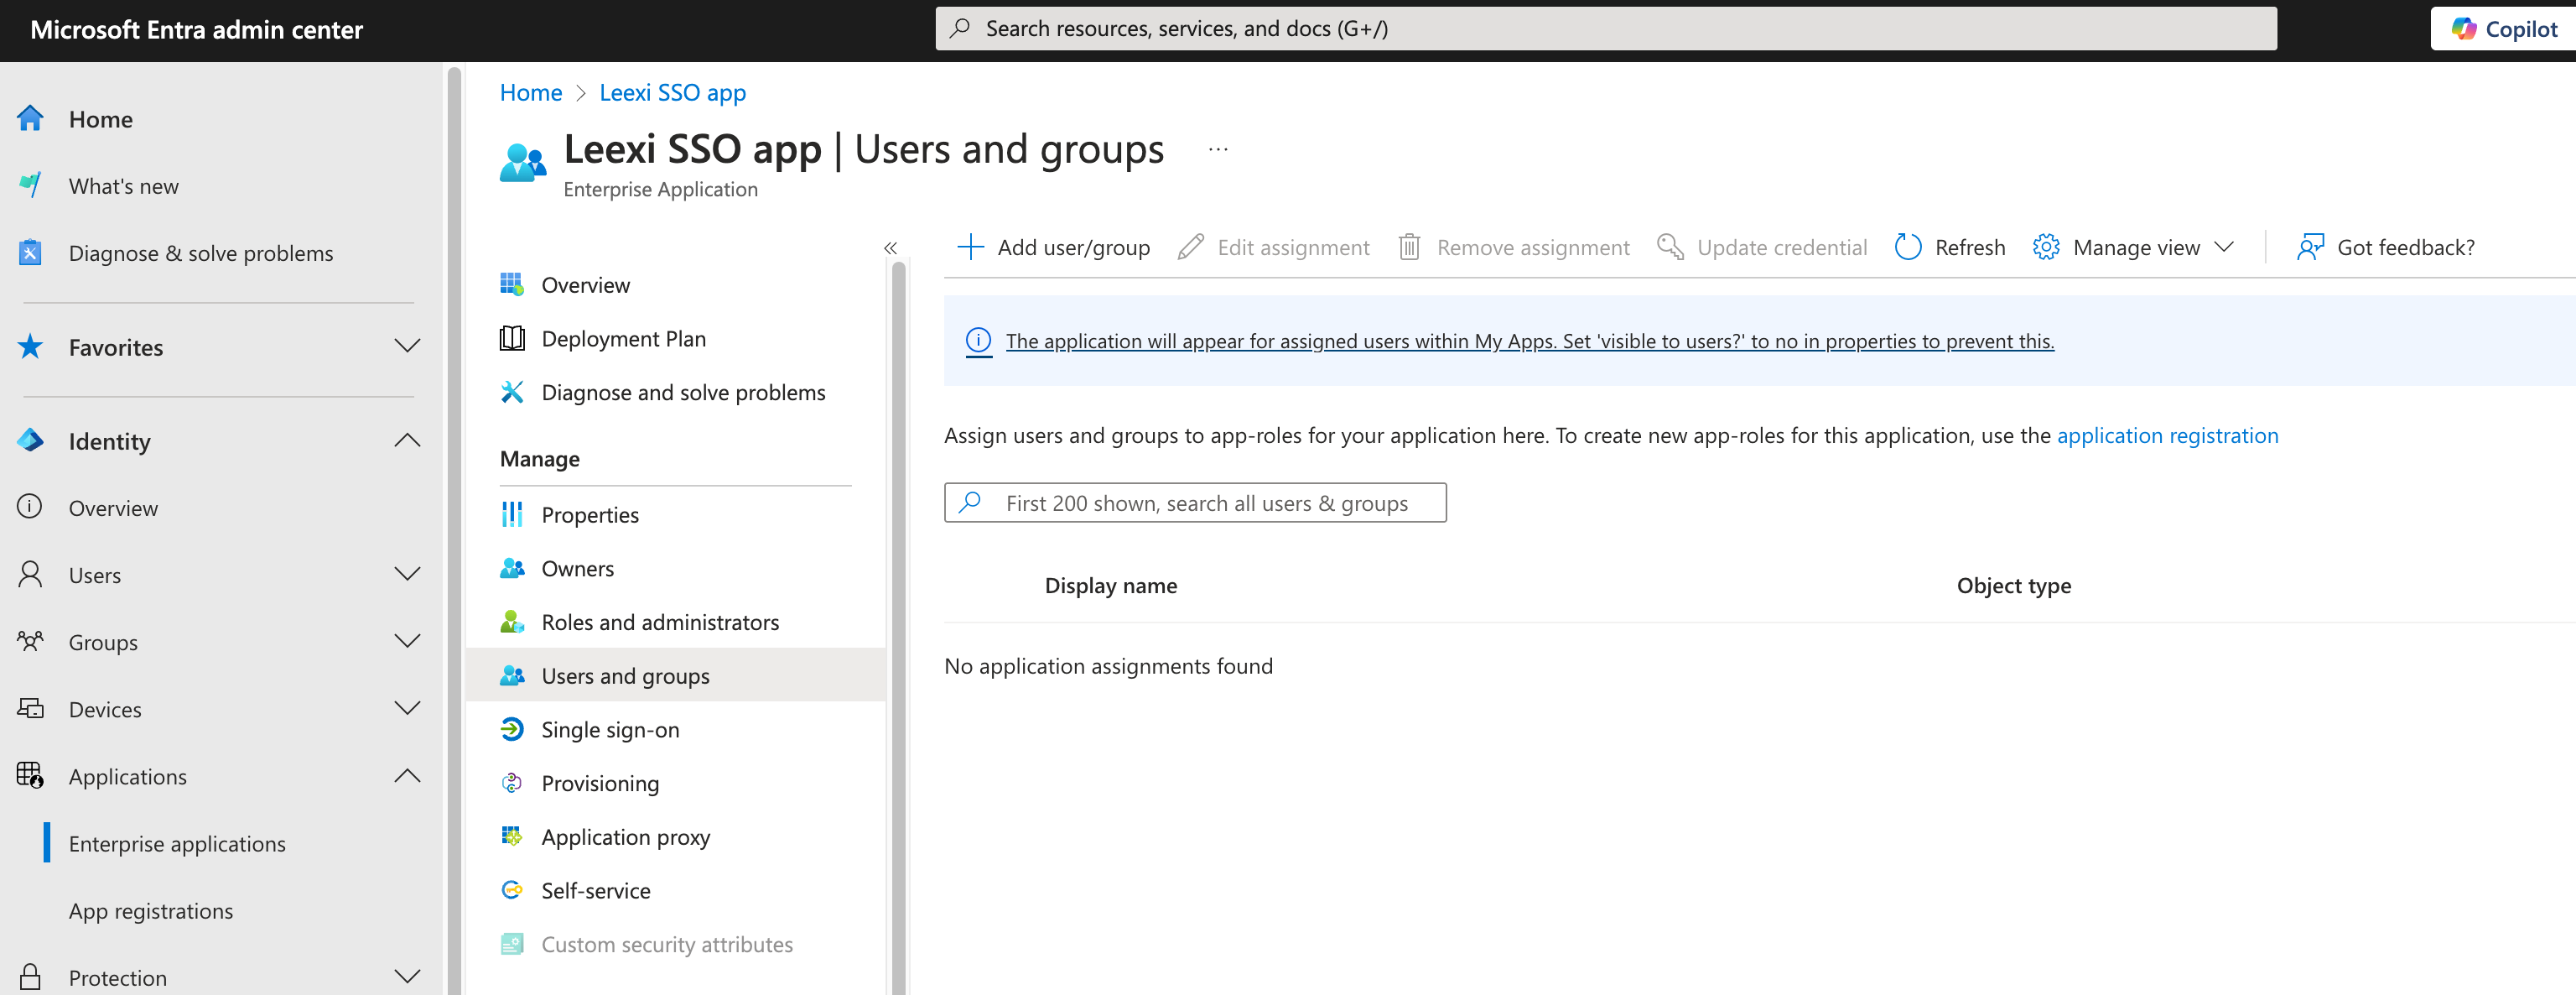
Under Users, click None Selected, check the box for each user to assign to the application (remember to include yourself if you plan to test it), click Select at the bottom, then Assign.
SSO is now configured for these users: they can sign in with their Microsoft credentials.
Going further
Enforce SSO login (optional)
After the steps above, users in your workspace can still sign in with email/password or already via SSO. Once all users have been onboarded and have successfully signed in via SSO, you can enforce SSO across your entire workspace. Only Leexi has the authority to disable this setting, to prevent any unwanted behavior.
Automatic user provisioning with SCIM (optional)
Follow these instructions to set up automatic user provisioning via SCIM.
Authentication
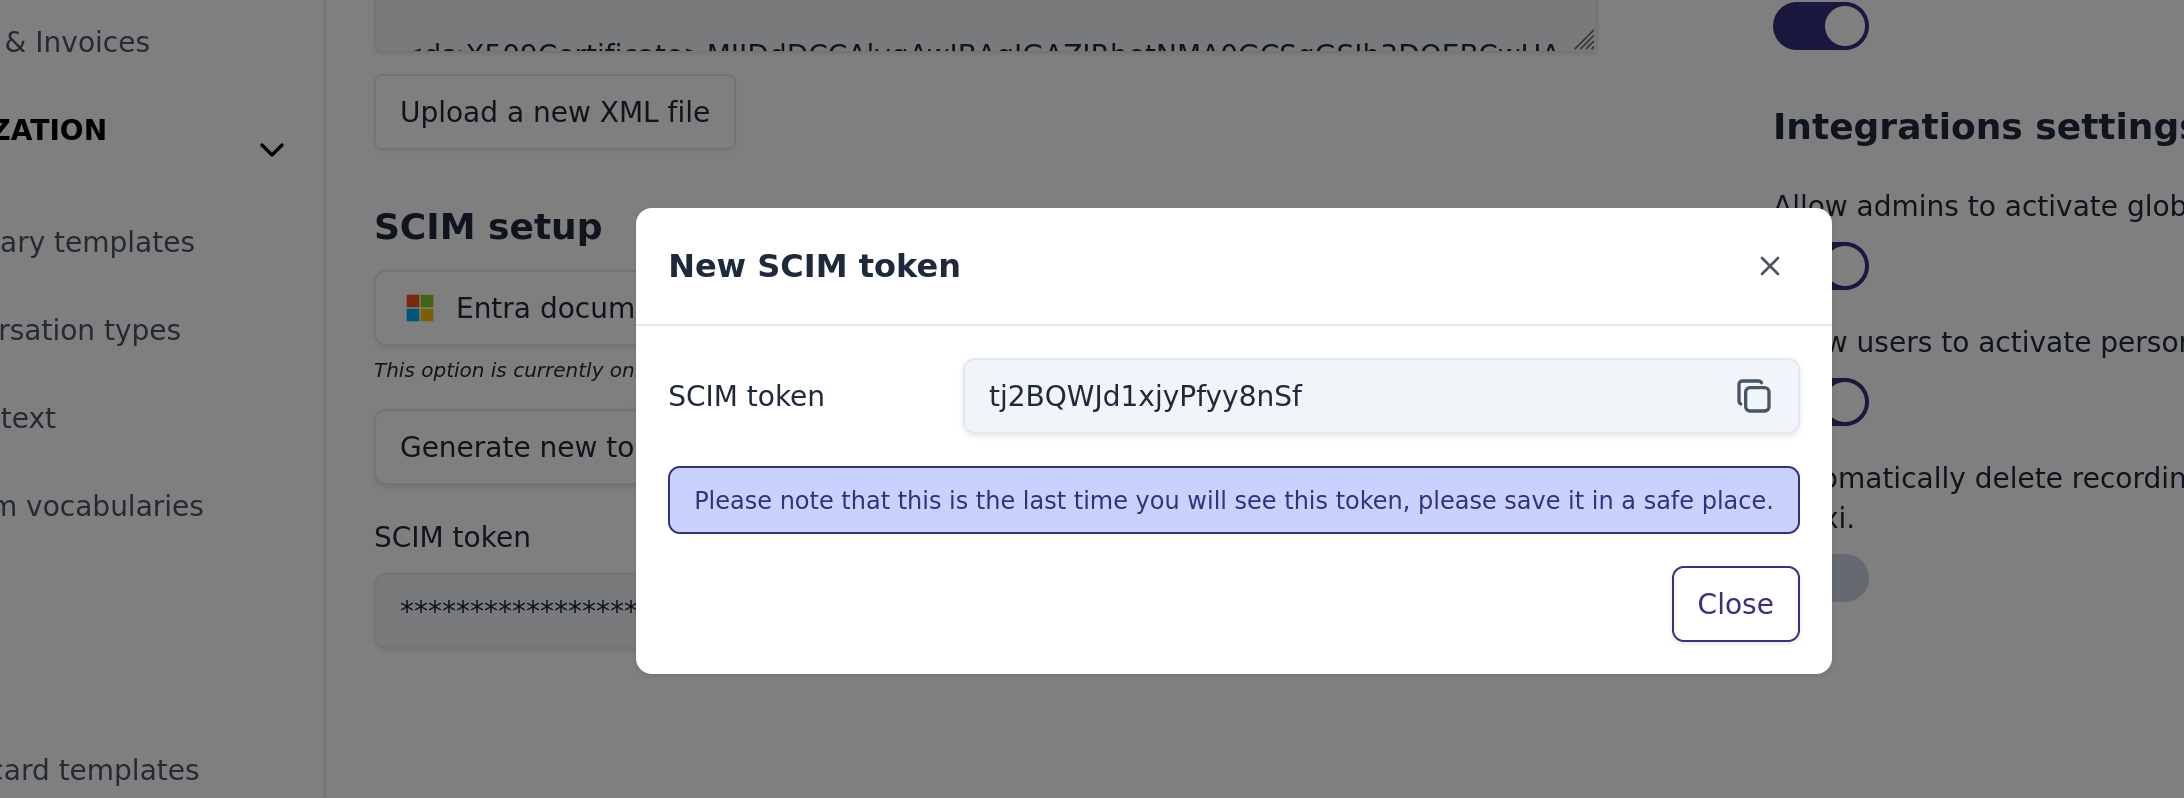
Go to https://app.leexi.ai/en/settings/security, then generate and copy an SCIM secret token.
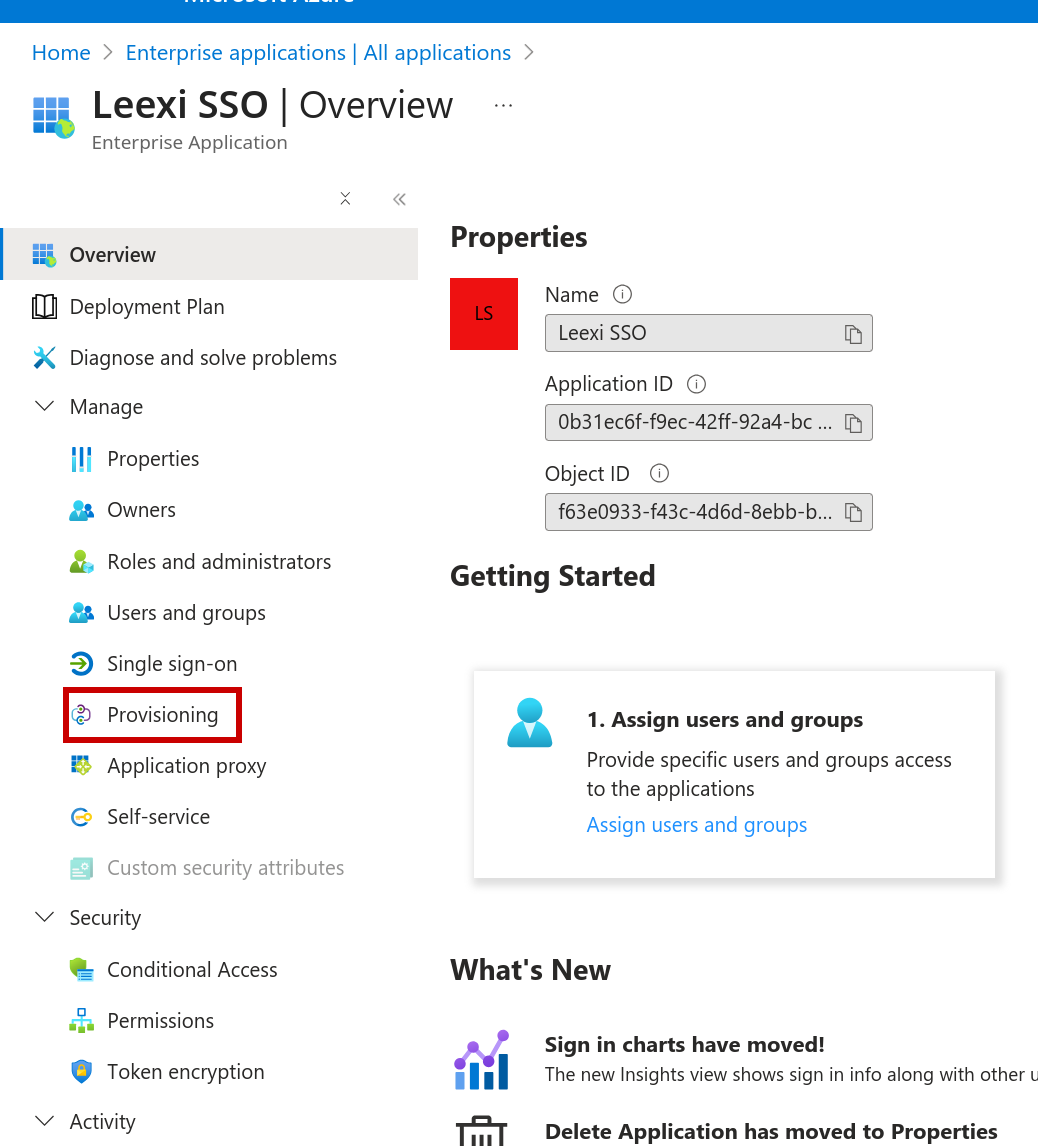
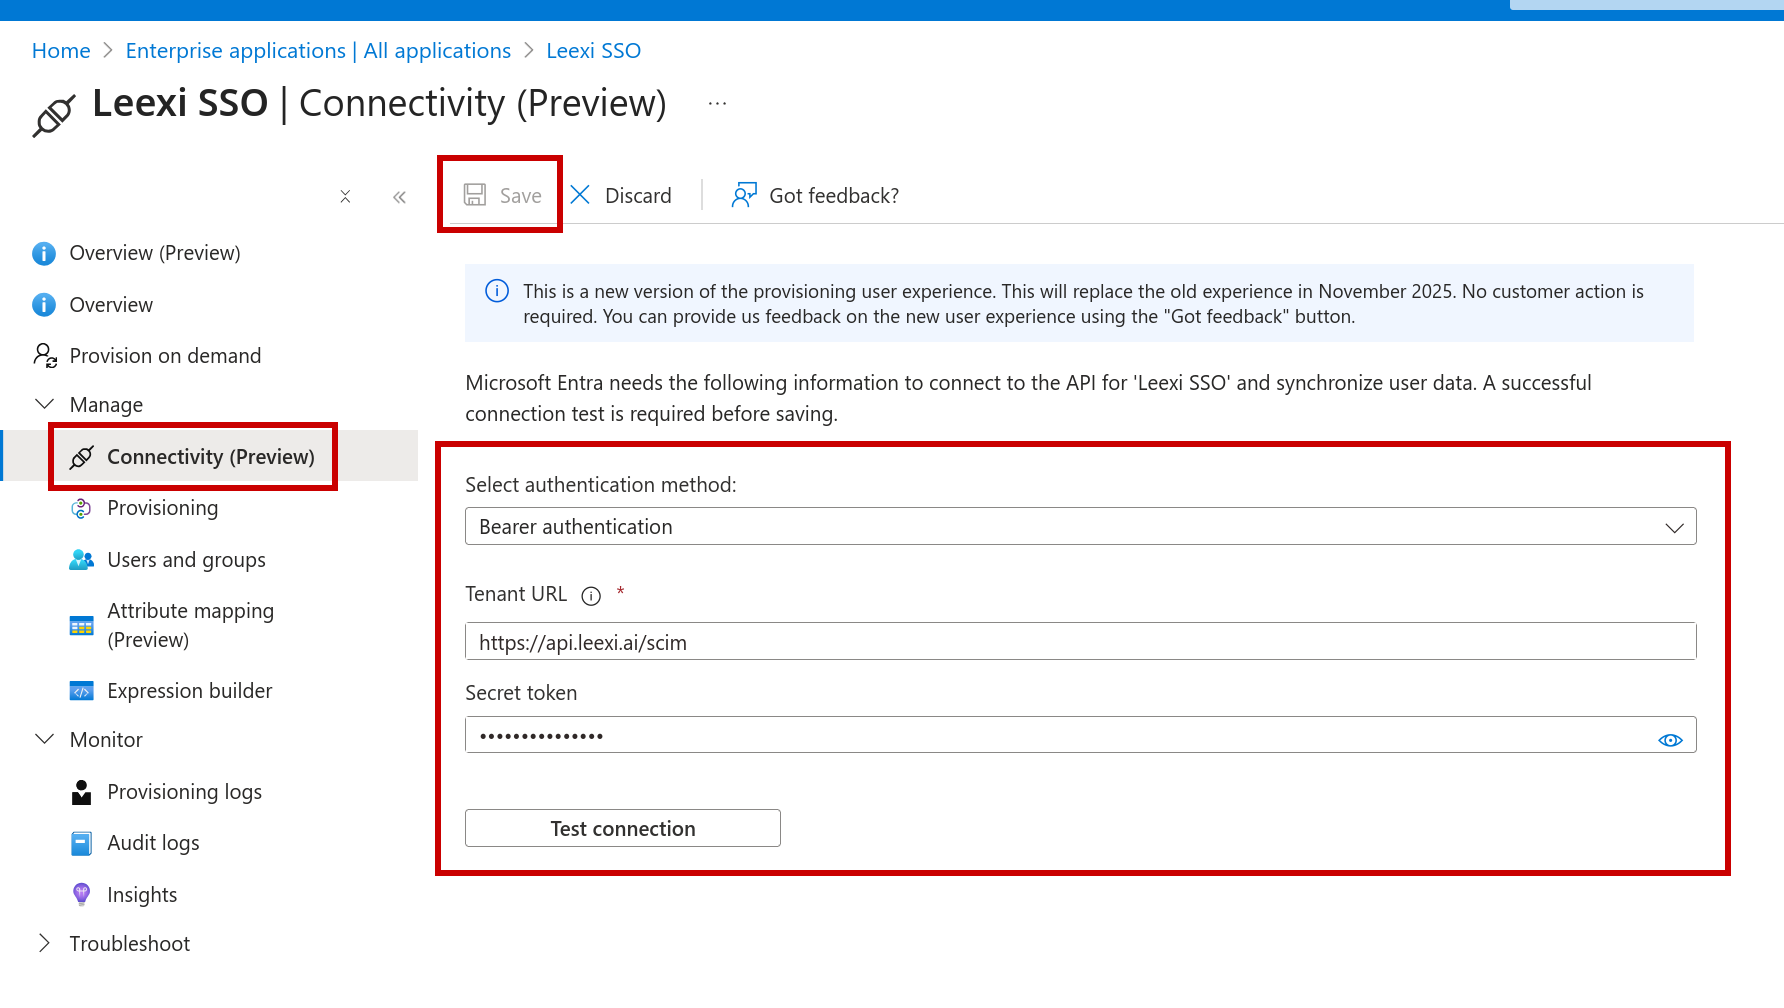
In Entra, on the same application used for SSO, go to Provisioning.
Then under Connectivity, select Provisioning Mode: Automatic and fill in:
- Authentication Method: Bearer token
- Tenant URL:
https://api.leexi.ai/scim - Secret Token: paste the token you just generated in Leexi
Click Test Connection then Save.
Configure available roles
To be able to assign Leexi roles from the Azure application, you must follow the configuration steps below. Without this configuration, all users created via SAML will get the "member" role.
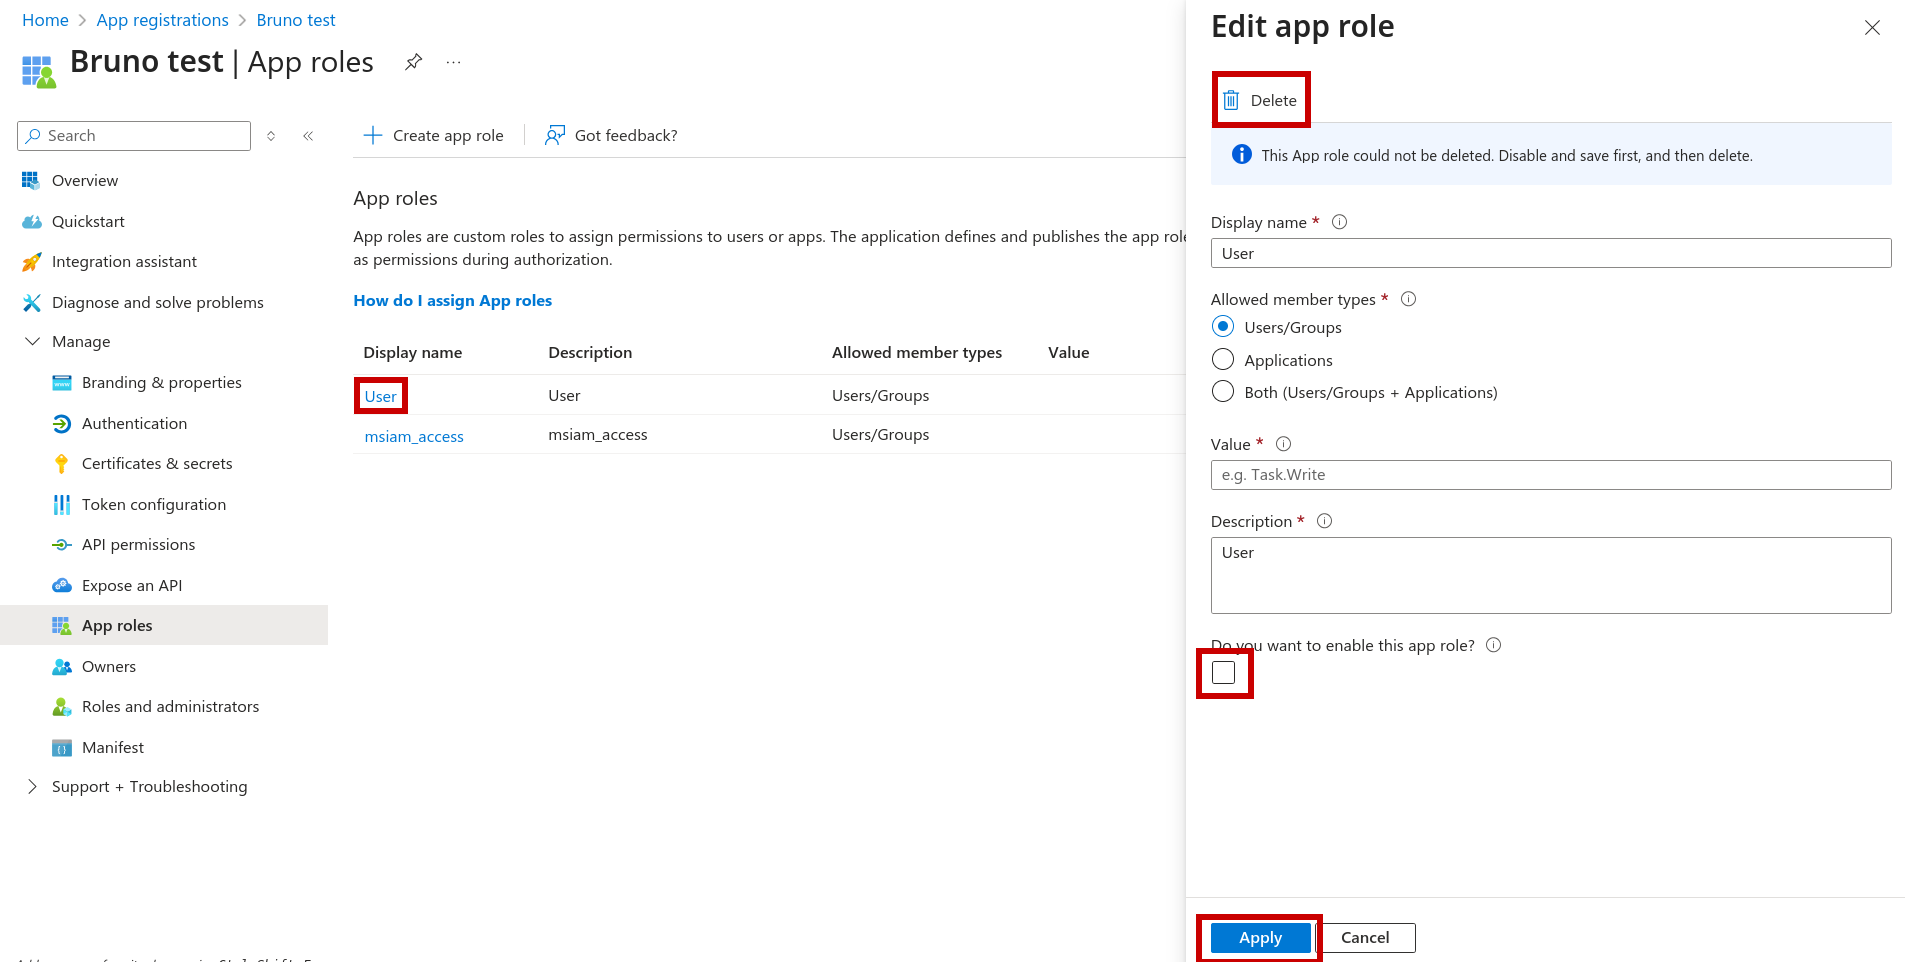
In Azure, go to App registrations (not Enterprise applications), click your Leexi application, then go to App roles.
Delete the default User and msiam_access roles: click the role, uncheck "Do you want to enable this app role…", click Apply, then click the role again and the Delete button.
Click Create app role and create the member role.
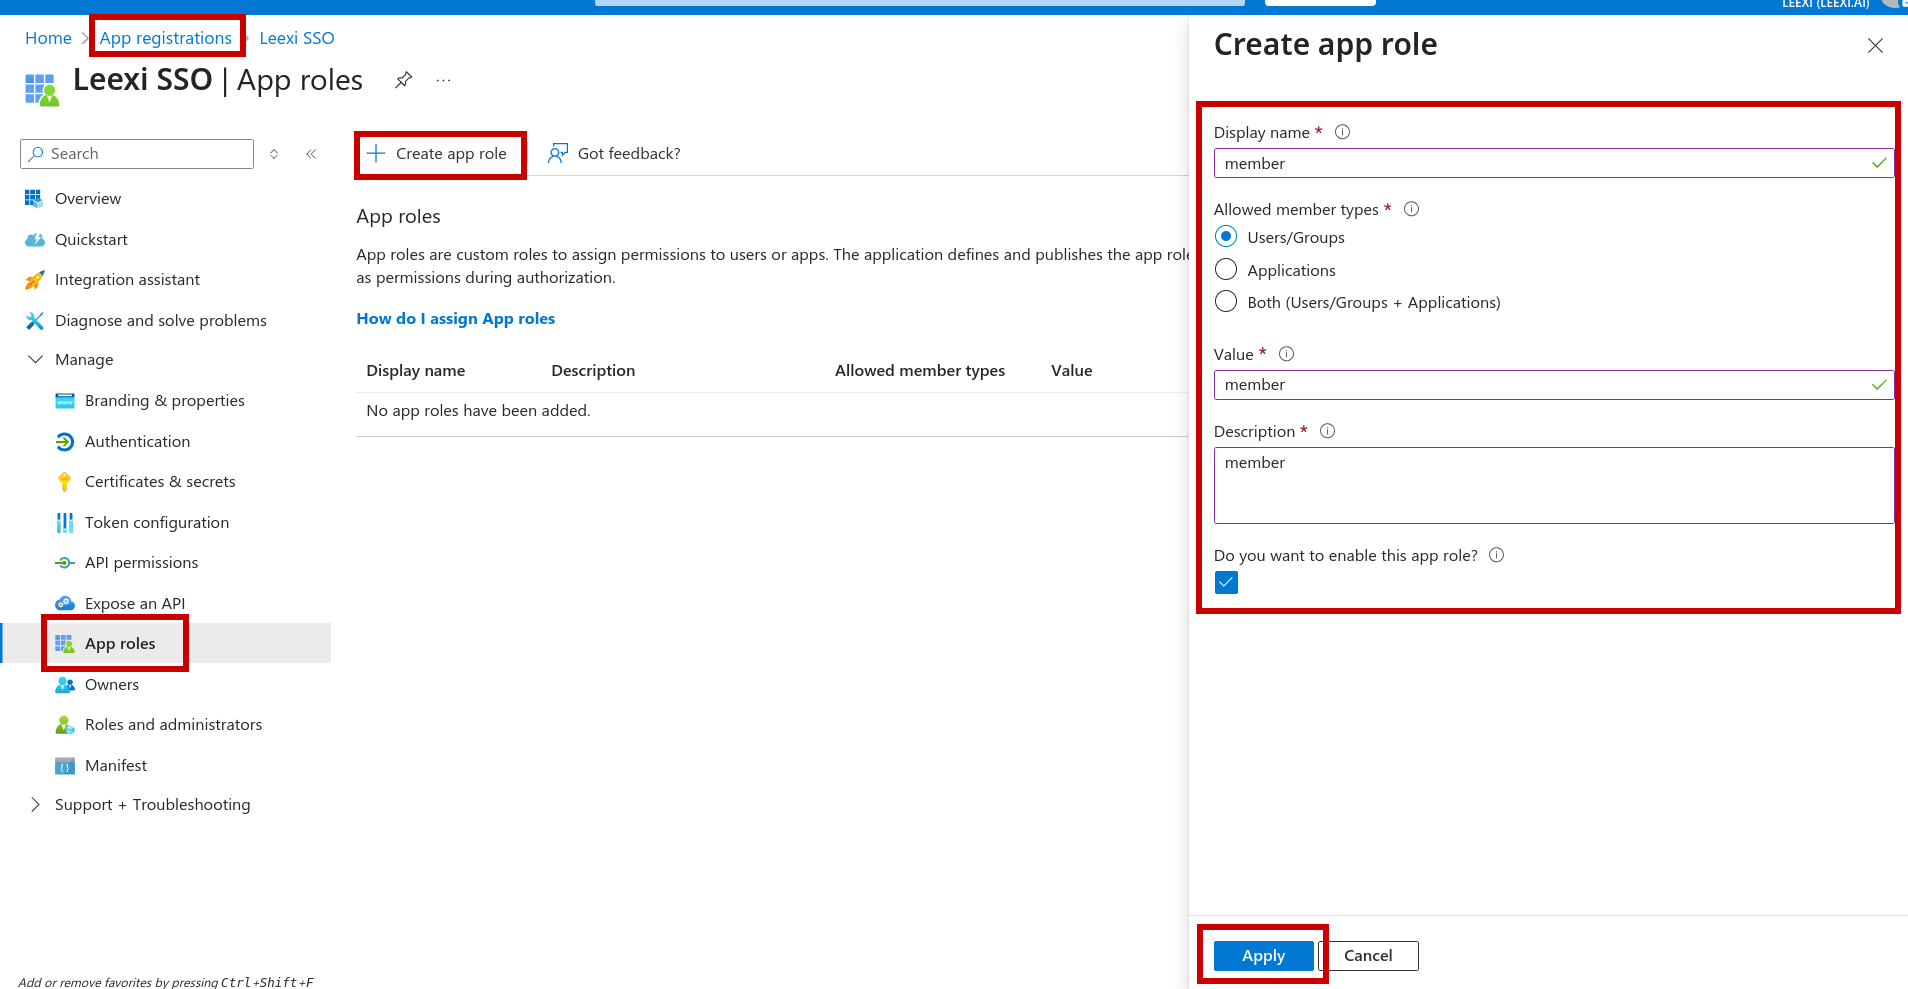
Do the same for each Leexi role: member, basic member, super admin, system admin, user admin, company manager, team manager, billing manager.
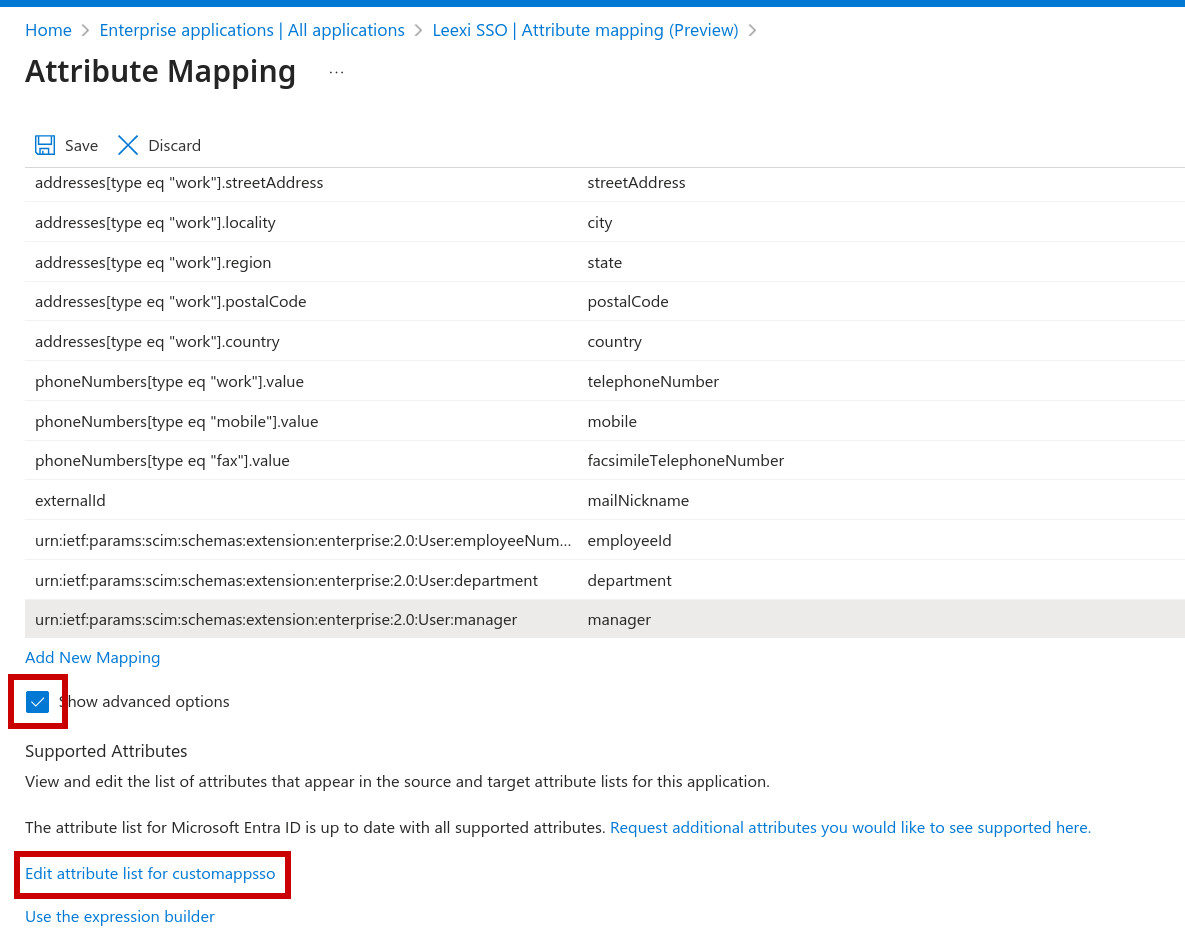
Go back to your application in Enterprise applications, under Provisioning > Attribute Mapping > Provision Microsoft Entra ID Users.
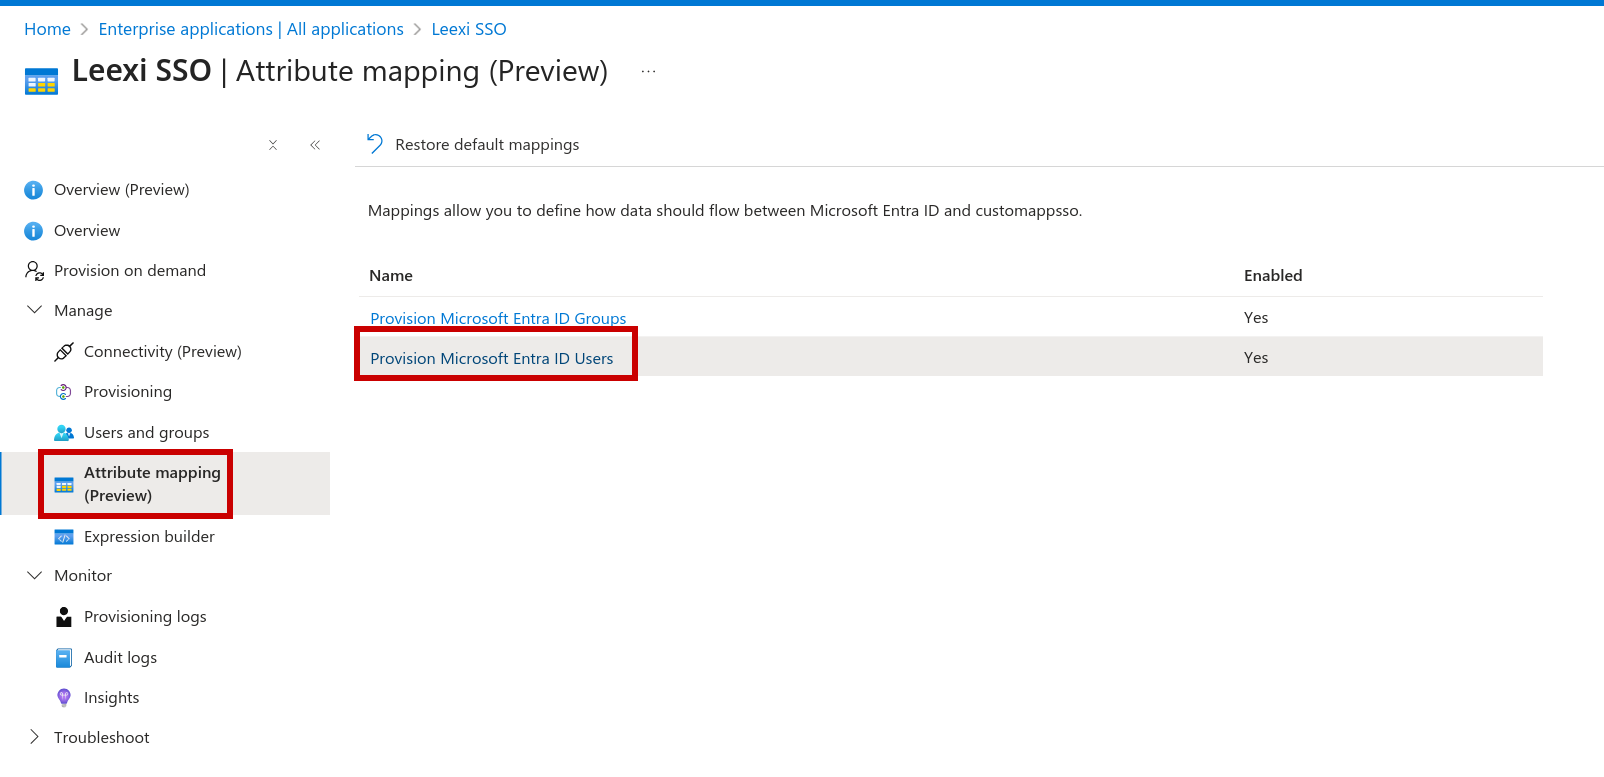
Then Show advanced options > Edit attribute list for customappsso.
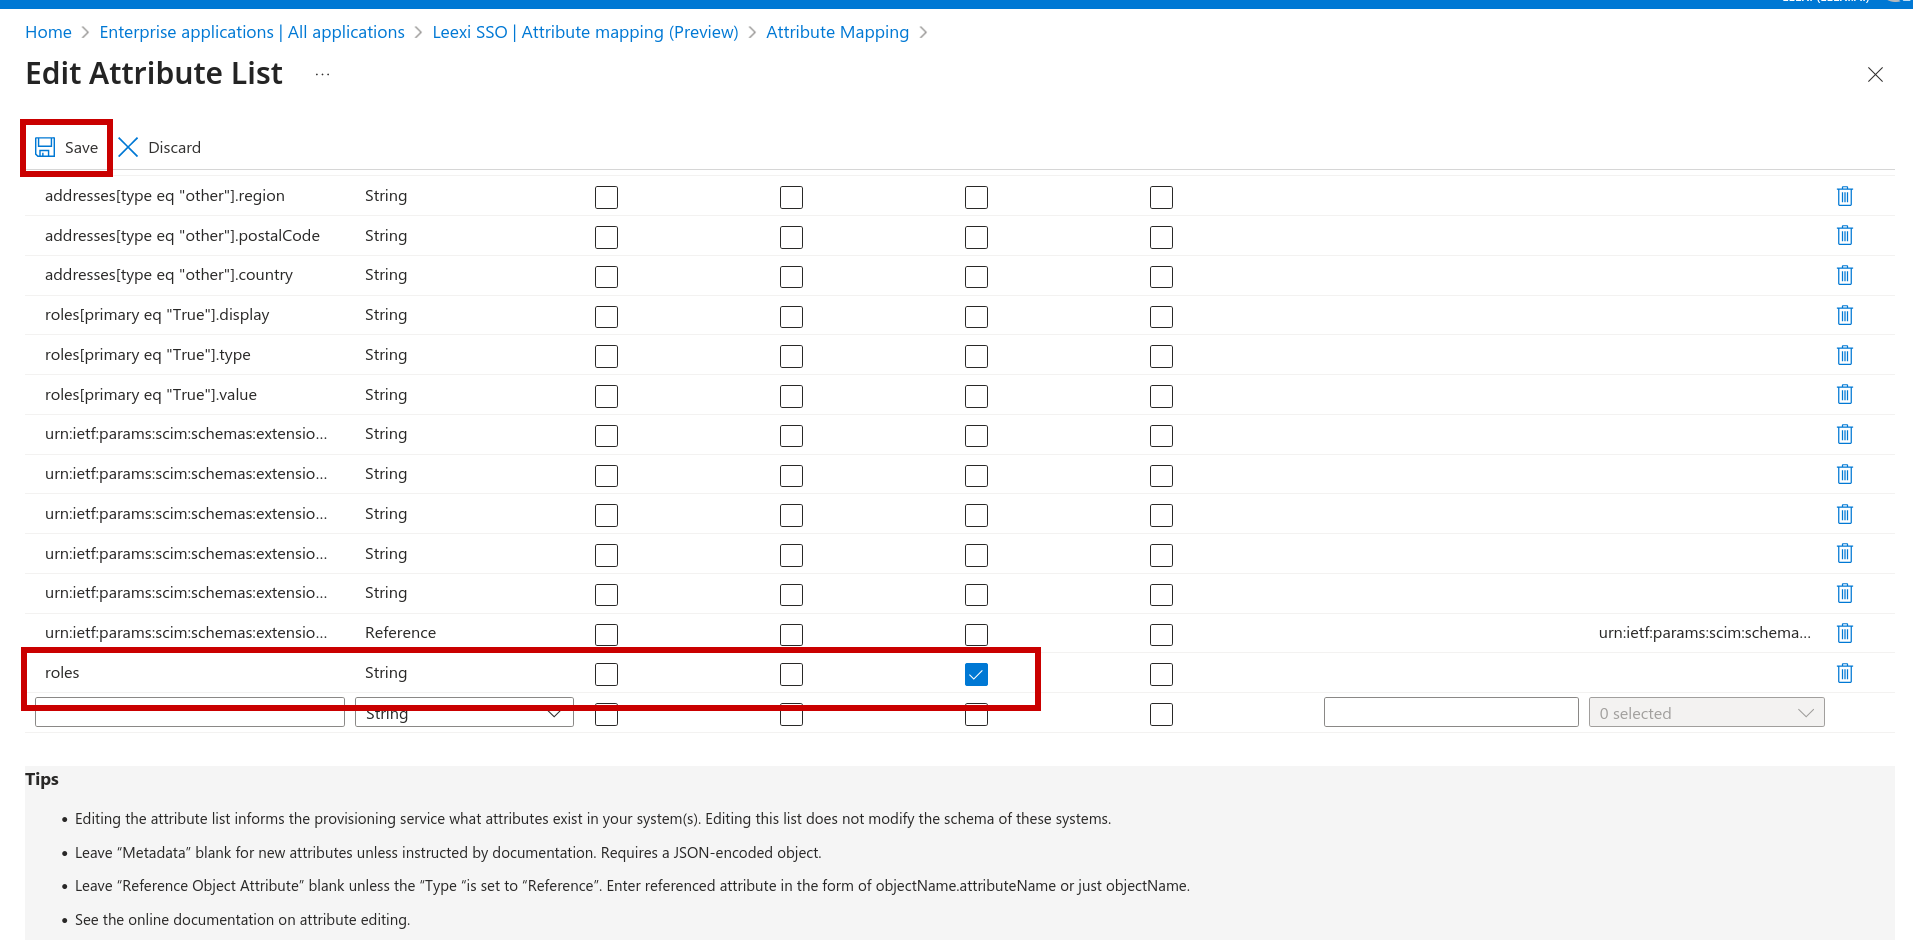
Add a roles attribute, of type "String", with the Multi-value box checked, then Save.
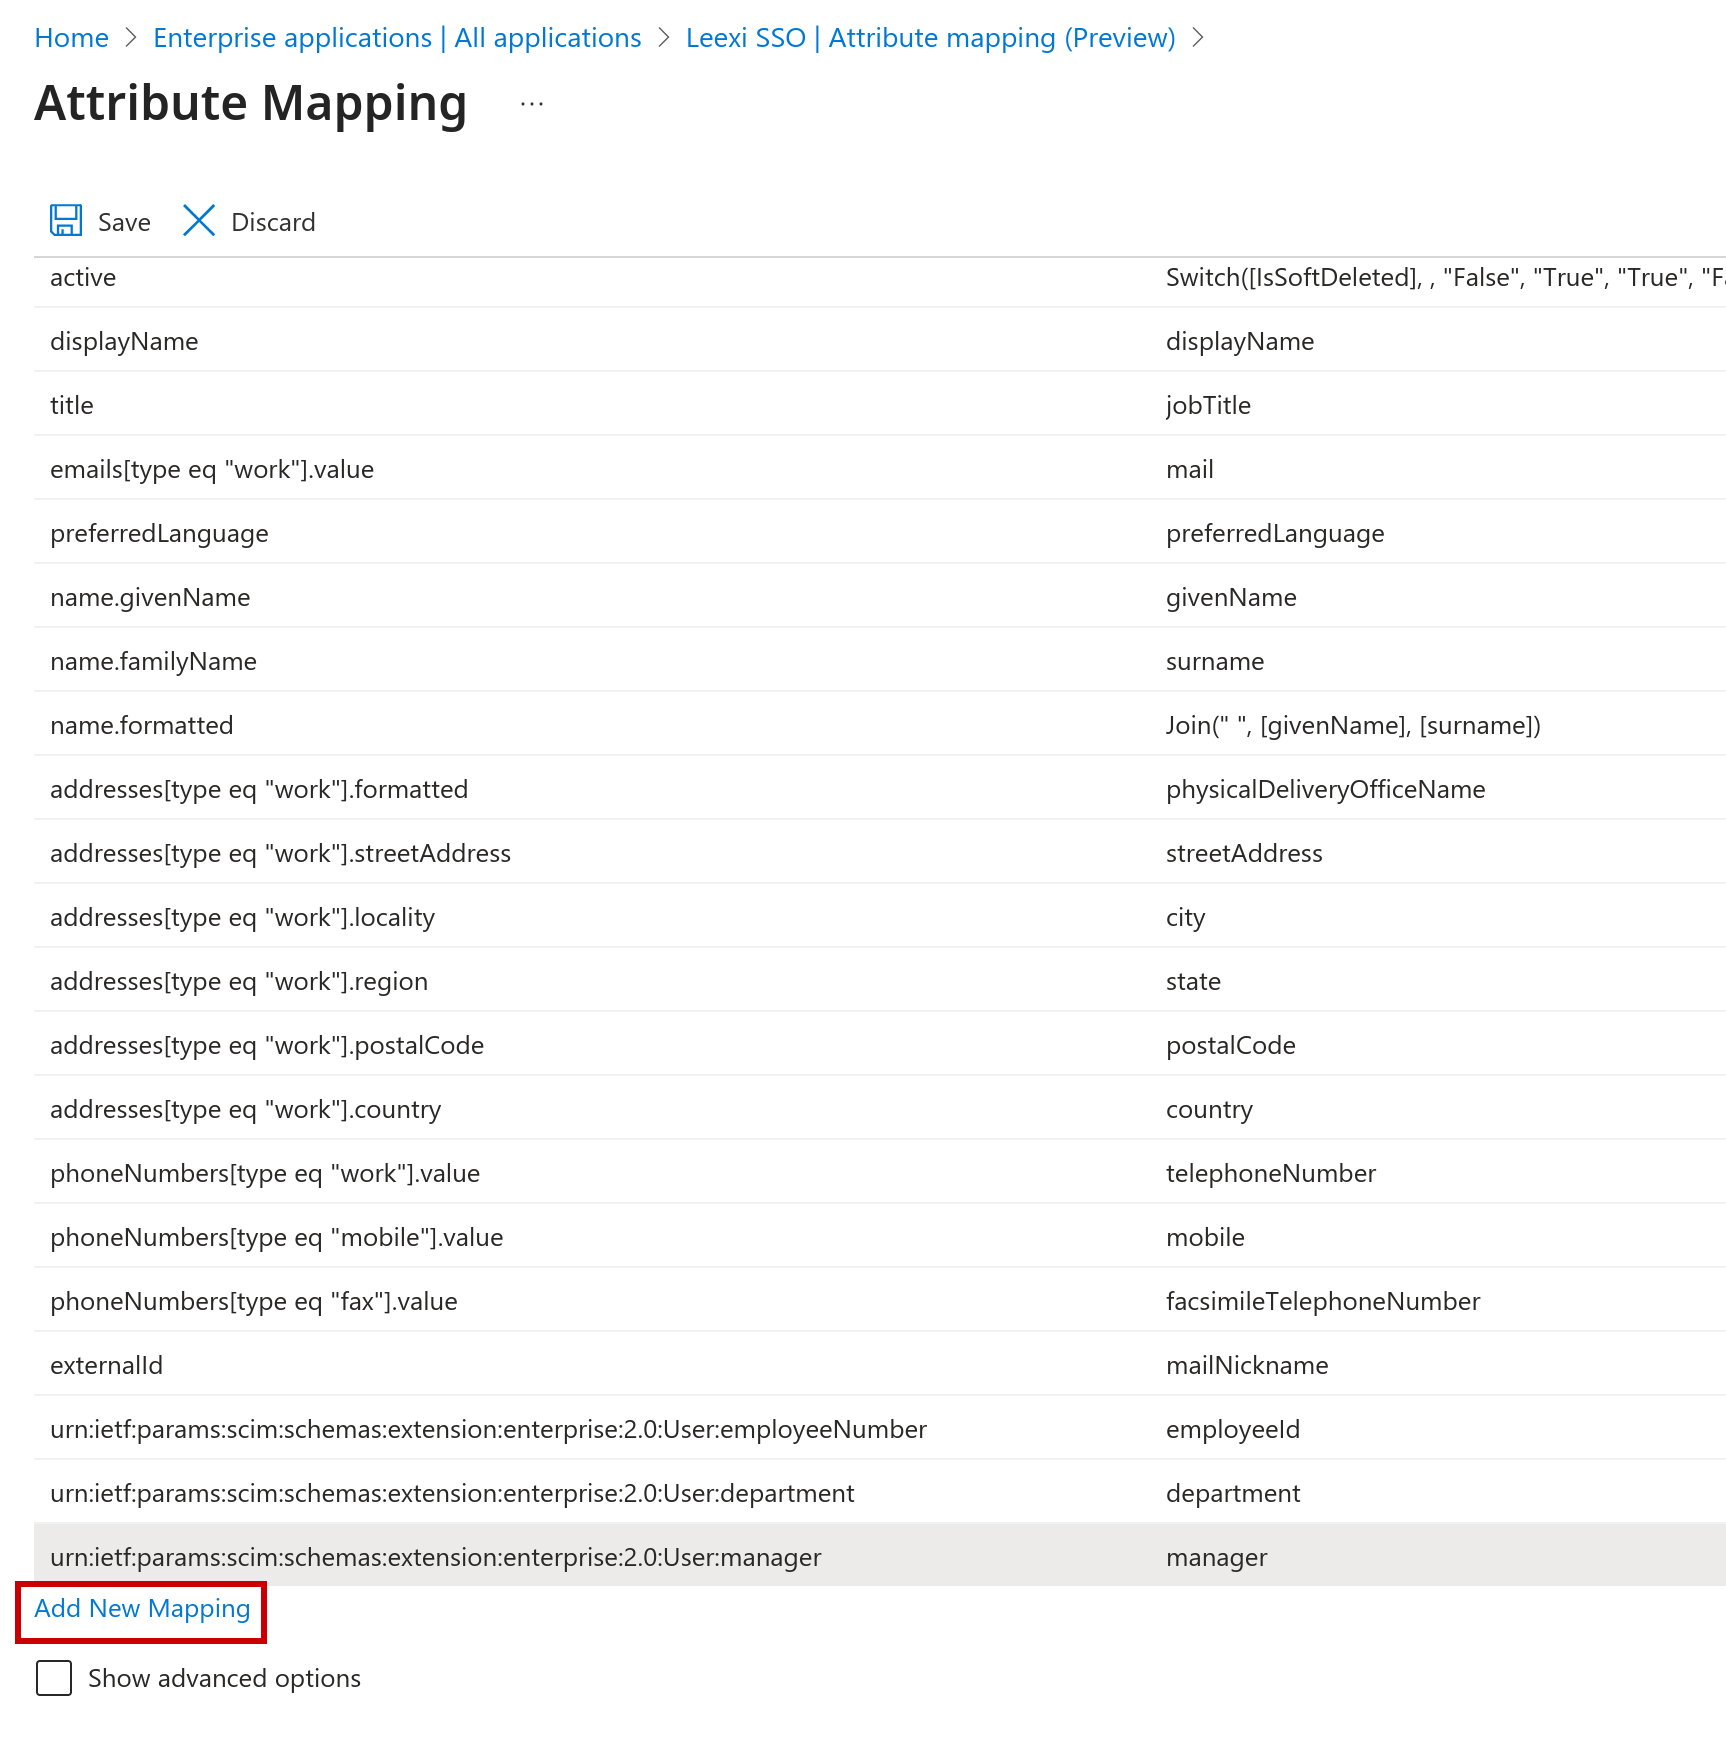
Click Add new mapping.
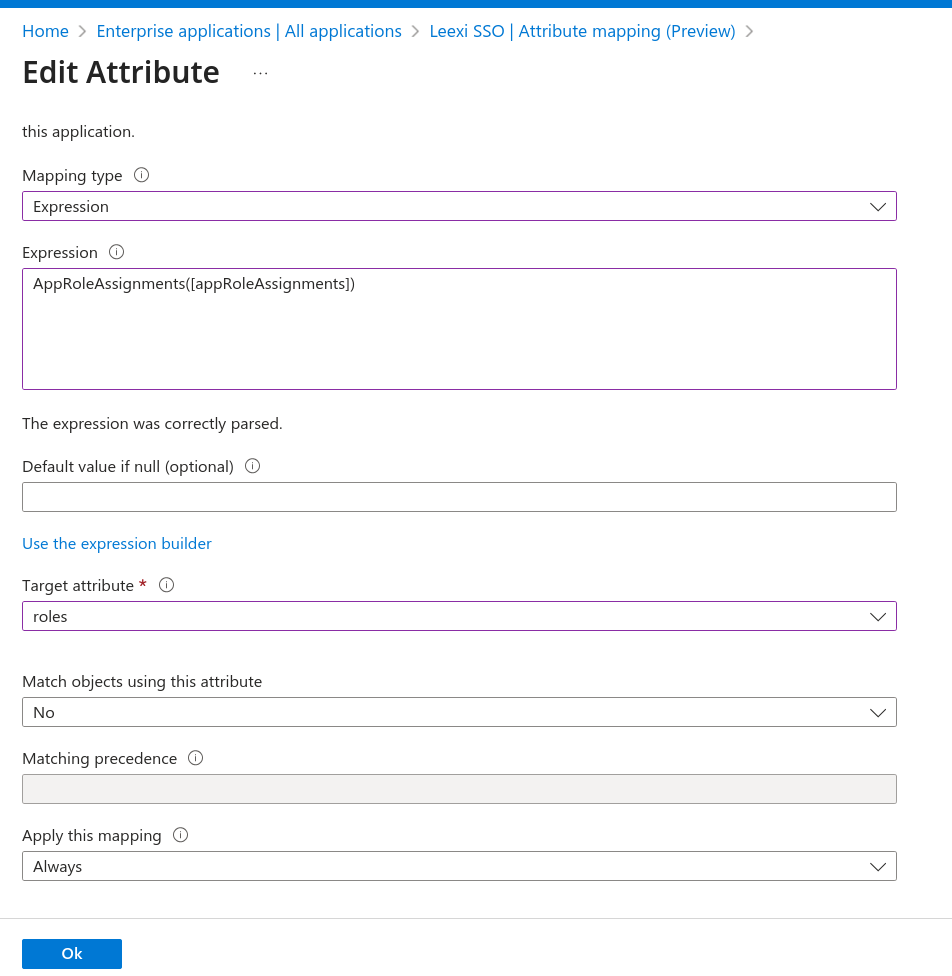
Set:
- Mapping type: Expression
- Expression:
AssertiveAppRoleAssignmentsComplex([appRoleAssignments]) - Target attribute:
roles
Then click Ok, then Save.
Provision users and groups
You are now ready to add users and groups, with their associated roles.
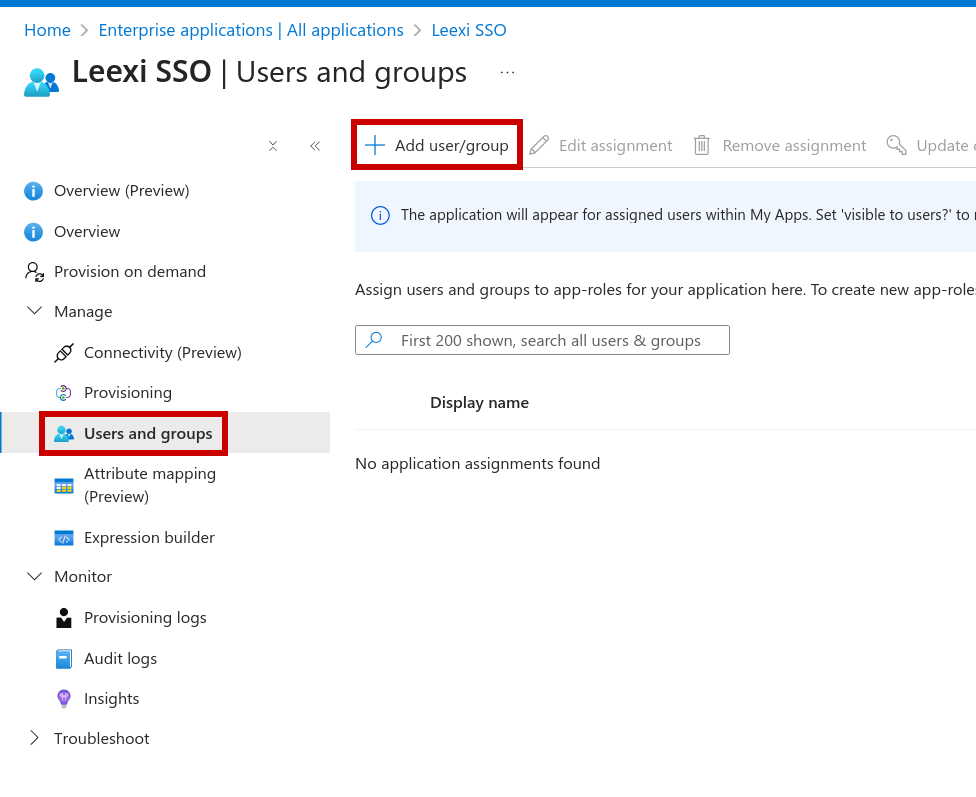
They will be automatically created in Leexi. Microsoft groups correspond to Leexi teams. Make sure to assign each user to a single group, since a user can only belong to one team in Leexi. If you need to assign multiple roles to the same users/groups, add the assignment multiple times with a different role each time.
We recommend assigning only groups to the application, not users directly: users assigned directly cannot be automatically attached to the correct Leexi team.
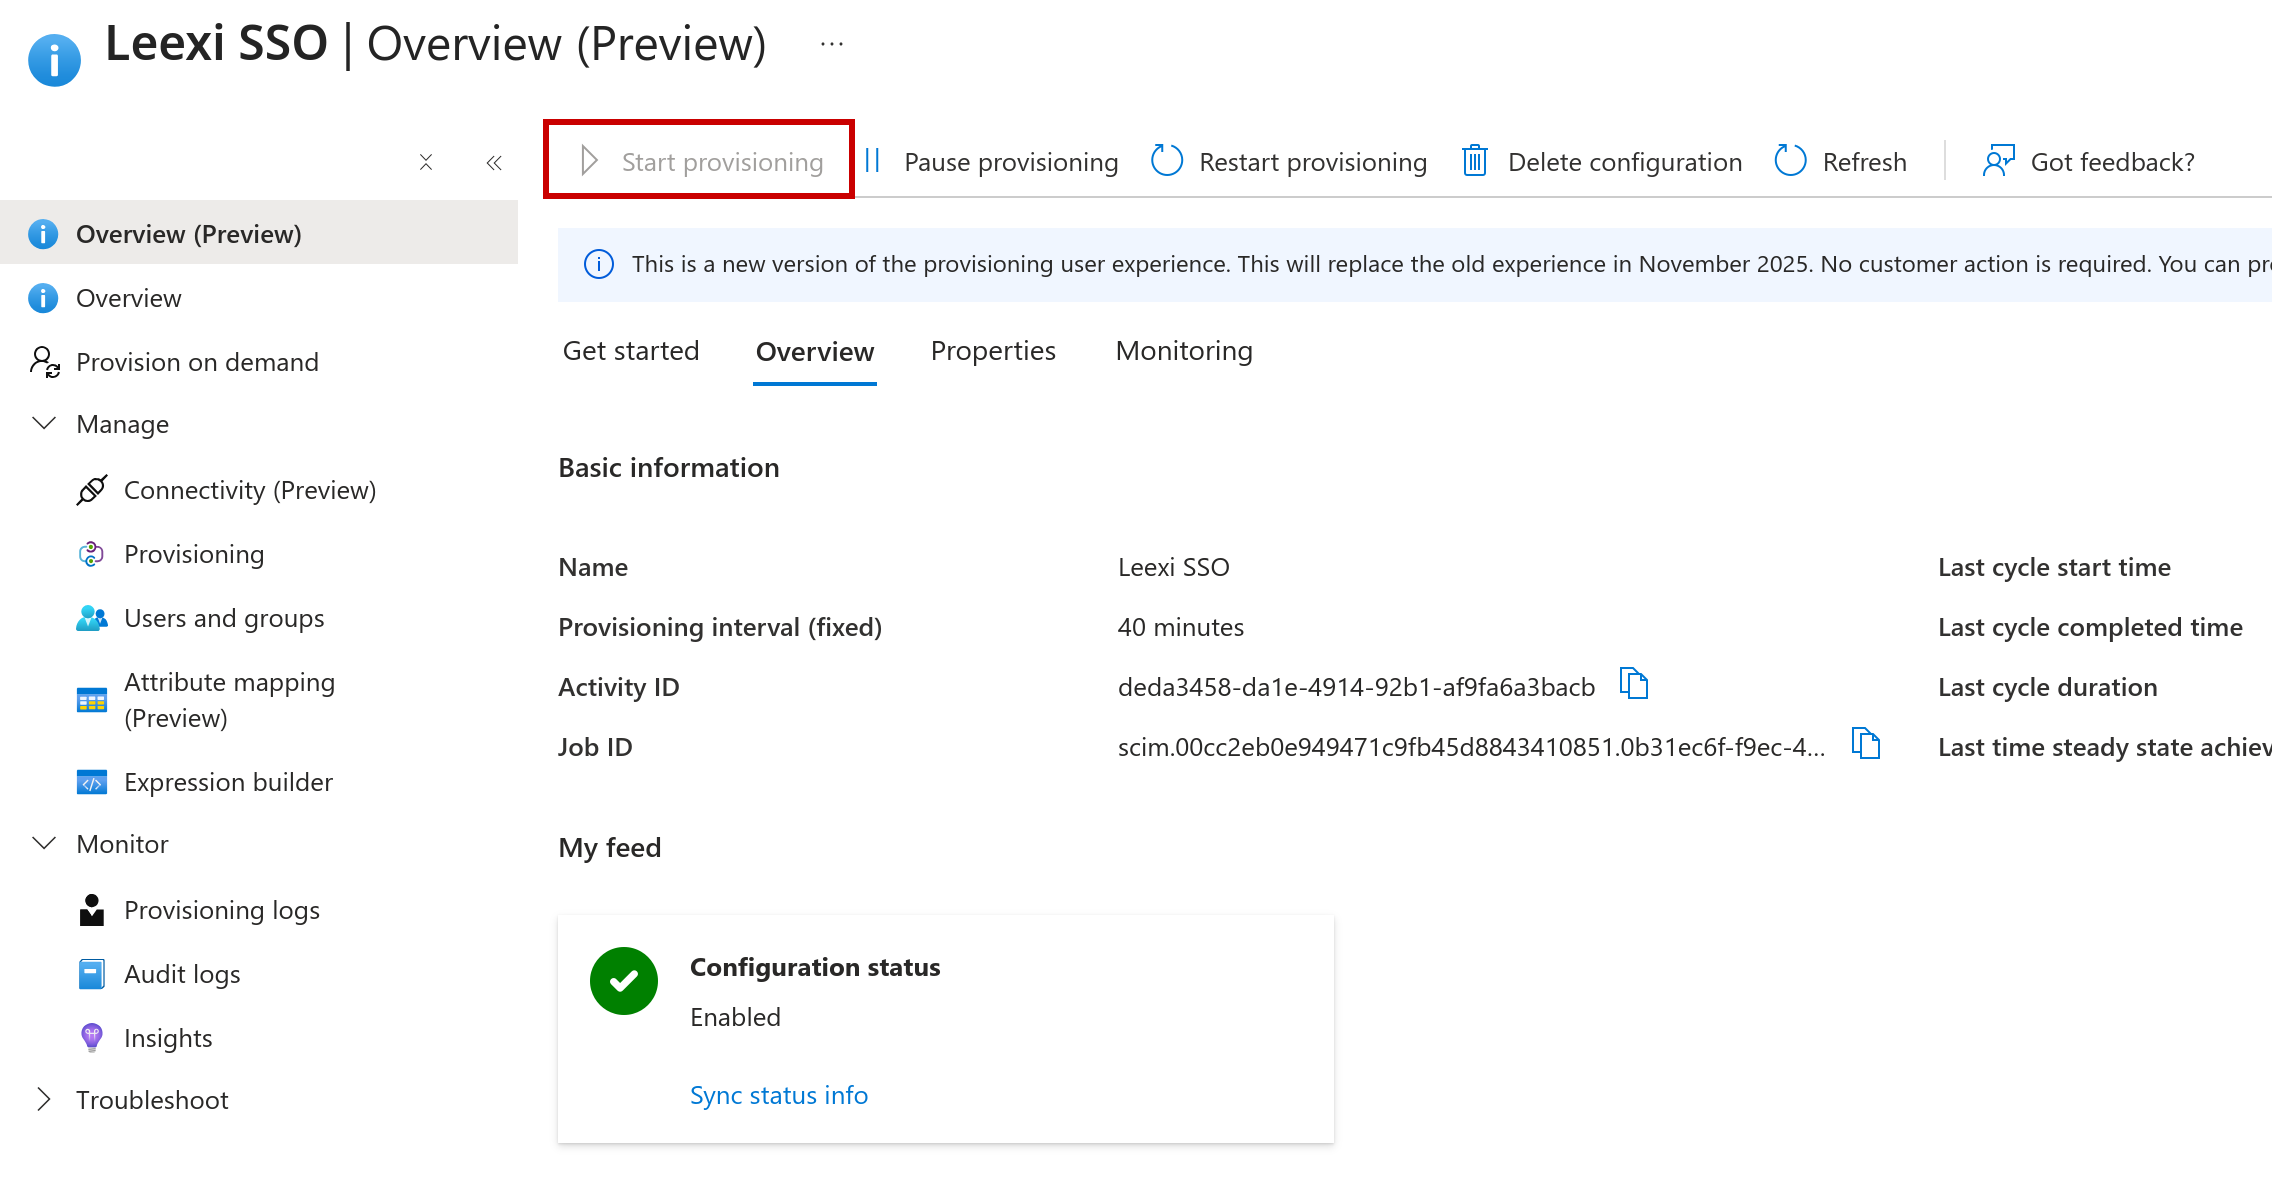
Once users and groups are configured, go to Overview and click Start provisioning.
Things to watch out for
- Without app role configuration, all users created via SAML receive the "member" role.
- A user can only belong to a single Leexi team: assign each user to a single group.
- Once SSO is enforced on the workspace, only Leexi can disable this setting.